Handheld sewing machines are compact, portable tools designed for quick repairs and small projects. They combine ease of use with versatility, making them ideal for fabric, upholstery, and DIY tasks.
1;1 Benefits of Using a Handheld Sewing Machine
Handheld sewing machines offer portability and convenience, allowing users to sew anywhere without being tethered to a desktop. They are ideal for quick repairs, small projects, and delicate fabrics. Their compact size makes them easy to store, and many models are battery-powered, enhancing their portability. These machines are perfect for beginners and DIY enthusiasts, providing a user-friendly experience for various sewing tasks.
1.2 Types of Handheld Sewing Machines
Handheld sewing machines come in various types, including battery-powered, cordless, and manual models. Some feature dual speeds for precision, while others include extension tables for larger projects. They may also come with additional accessories like sewing kits and lights, catering to different user needs and preferences for versatility in sewing tasks.
Safety Precautions and Initial Setup
Always ensure proper handling and setup to guarantee safe and effective use. Start by unpacking carefully, familiarizing yourself with components, and following battery safety guidelines. Handle thread with care to avoid tangling or breakage. Read the user manual thoroughly to understand operational procedures and prevent accidents during initial use.
2.1 Unpacking and Understanding the Machine Components
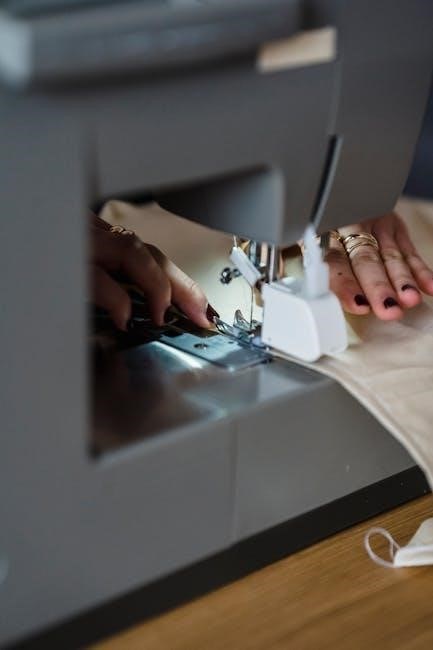
Begin by carefully unpacking the handheld sewing machine and inspecting its components. Familiarize yourself with the rotary wheel, tension control, threader, and fastening plate. Locate the needle arm and spool pin, essential for threading. Ensure all parts are intact and understood before use. Handle the machine gently to avoid damage and always refer to the manual for specific component functions and safety guidelines.
2.2 Inserting Batteries or Powering the Machine
Insert 4 AA batteries into the battery compartment, ensuring correct polarity. For powered models, plug in the machine and ensure the power switch is in the off position. Some machines offer dual modes, allowing you to switch between handheld and desktop use. Always lock the machine when not in use and refer to the manual for specific power requirements. Use high-quality batteries for optimal performance.
2.3 Essential Safety Guidelines
Always unplug the machine when not in use and avoid touching the needle or moving parts. Keep the machine out of children’s reach and ensure the work area is clear. Use the rotating dial to move the needle and never press or pull the needle arm directly. Properly thread the machine and avoid sewing near flammable materials. Regularly clean and maintain the machine for safe operation.
Reading the Instruction Manual
Reading the instruction manual is crucial for safe and effective use. It provides detailed guides, key symbols, and diagrams, ensuring proper operation and troubleshooting. Essential for all users.
3.1 Navigating the PDF Manual
Navigating the PDF manual is straightforward. Users can access sections via bookmarks or hyperlinks. The table of contents provides quick jumps to key areas like setup, operation, and troubleshooting. Zooming in on diagrams enhances clarity. Searching for specific terms using the ‘Find’ tool saves time. Ensure the PDF reader is updated for optimal functionality and navigation.
3.2 Key Symbols and Terminology
Understanding key symbols and terminology in the manual is essential. Symbols like the power button, stitch mode, and thread direction guide operation. Terms such as “needle arm,” “spool pin,” and “mode selector” are frequently used. These elements help users grasp machine components and functions. Familiarizing yourself with these symbols and terms ensures proper usage and troubleshooting. They are clearly defined in the manual for easy reference.
3.3 Visual Aids and Diagrams
The manual includes detailed visual aids and diagrams to guide users through setup and operation. Parts diagrams help identify components like the needle arm and spool pin. Step-by-step illustrations demonstrate threading processes and stitch modes. These visuals simplify complex tasks, ensuring users can troubleshoot and operate the machine confidently. They are essential for understanding proper usage and maintenance.

Threading the Machine
Threading involves raising the needle, securing thread on the spool pin, guiding it through tension discs, and inserting it into the needle. Ensure proper tension and test stitches.
4.1 Step-by-Step Threading Process
Start by turning the rotary wheel to raise the needle to its highest position. Attach the thread to the spool pin and guide it through the tension discs. Pull the thread gently through the needle, ensuring it is properly seated; Keep the machine unplugged during this process to avoid accidents. Finally, test the thread tension by sewing a few stitches on scrap fabric.
4.2 Adjusting Tension for Proper Stitching
Locate the tension dial on your handheld sewing machine. Turn it clockwise to tighten the thread or counterclockwise to loosen it. Test the stitch quality on scrap fabric. Proper tension ensures even stitching without thread breakage; If stitches are too loose, tighten the tension; if too tight, loosen slightly. Adjusting tension correctly is key to achieving consistent and professional-looking results.
4.3 Tips for Avoiding Thread Breakage
To prevent thread breakage, ensure the needle is properly installed and the thread is pulled taut before sewing. Avoid pulling the fabric too forcefully, as this can strain the thread. Use high-quality thread suitable for your fabric type and keep the machine well-lubricated. Regularly check for thread knots or tangles and trim excess thread near the needle. Proper tension adjustment also helps minimize breakage.
Basic Operation and Stitching
Start by turning on the machine and selecting the desired stitch mode. Gently guide the fabric under the needle, maintaining steady movement for consistent stitching. Begin small projects to familiarize yourself with the machine’s operation and stitch quality.
5.1 Turning the Machine On/Off
To operate the handheld sewing machine, locate the power switch or button, usually found on the top or side. Press and hold the switch to turn it on. Some models may require unlocking the machine first. Once powered on, the machine will hum softly. To turn it off, press the power switch again; Ensure the needle stops completely before setting the machine down. Always lock the machine when not in use for safety.
5.2 Selecting the Right Stitch Mode
Most handheld sewing machines offer multiple stitch modes, such as straight stitch or zigzag. Refer to the manual or on-machine indicators to choose the correct mode for your fabric type. Use the control dial or button to switch modes. For delicate materials, opt for a straight stitch, while thicker fabrics may require a zigzag stitch for better grip and durability. Always test on scrap fabric first.
5.3 Starting Your First Sewing Project
Begin by placing the machine on a flat surface and ensuring the needle is in the highest position. Insert the fabric under the fastening plate, aligning the edge with the guide. Gently pull 2-3 inches of thread through the needle. Start sewing on scrap fabric to test the stitch quality. Once satisfied, proceed with your project, keeping the fabric taut and moving it smoothly under the needle.
Proper Handling and Technique
Hold the machine firmly with one hand, using your thumb to control the power switch. Keep the work area clear and fabric taut for smooth stitching.
6.1 How to Hold the Machine Correctly
To ensure precise control, hold the machine with your right hand, supporting its bottom with your fingers. Use your thumb to operate the power switch. Keep your grip firm but not overly tight, allowing smooth movement. Avoid touching the needle arm directly, as this can damage the mechanism. Proper handling ensures safety and even stitching.
- Use your thumb to control the power switch.
- Support the machine’s base with your fingers.
- Avoid pressing or pulling the needle arm directly.
6.2 Guiding the Fabric for Even Stitches
To achieve even stitches, align the fabric edge with the machine’s guide. Use the fastening plate to secure the fabric, ensuring it moves smoothly under the needle. Maintain consistent tension and avoid pulling the fabric, as this can cause uneven stitching. Use steady, controlled movements to guide the fabric for professional-looking results.
- Align fabric with the machine’s guide for accuracy.
- Use the fastening plate to secure fabric in place.
- Maintain steady, controlled fabric movement.
6.3 Maintaining Control While Sewing
Maintain control by gripping the machine firmly with one hand and guiding the fabric with the other. Use your thumb to operate the power switch, ensuring smooth, steady movement. Keep the fabric taut but not stretched to avoid misalignment. Regularly check the stitches to ensure evenness and make adjustments as needed for consistent results.
- Grip the machine firmly for stability.
- Guide fabric with your free hand.
- Keep fabric taut to prevent misalignment.
- Monitor stitches for consistent quality.
Troubleshooting Common Issues
Common issues with handheld sewing machines include thread jams, uneven stitches, and machine malfunction. Regular maintenance and proper threading can prevent many of these problems.
7.1 Solving Thread Jamming Problems
Thread jams are common in handheld sewing machines. To resolve, turn off the machine and gently remove the thread. Use scissors if necessary. Check for knots or tangles. Re-thread carefully, ensuring the thread passes through all guides smoothly. Avoid pulling the thread forcefully, as this can damage the machine. Regular cleaning of the machine’s interior can prevent future jams.
7.2 Fixing Uneven or Loose Stitches
Uneven or loose stitches often result from incorrect tension settings. Adjust the tension dial to tighten or loosen the thread as needed. Ensure the fabric is held steady and guided smoothly. Check the needle size and thread type for compatibility with the fabric. If issues persist, consult the manual for specific tension recommendations or reset the machine to its default settings.
7.3 Resetting the Machine
To reset your handheld sewing machine, turn it off and unplug it. Remove and reinstall the batteries or power source. Use a small pin to press the reset button, usually located near the power switch. Allow the machine to restart and adjust settings to factory defaults. This process often resolves issues like uneven stitching or mechanical delays. Always refer to the manual for specific reset instructions.
Maintenance and Care
Regularly clean the machine with a soft brush and mild detergent. Oil moving parts to prevent rust. Store in a dry place to avoid damage.
8.1 Cleaning the Machine
Cleaning your handheld sewing machine is essential for maintaining performance. Use a soft cloth to wipe down surfaces. Remove lint and debris from the needle area and bobbin space. Avoid harsh chemicals, as they may damage plastic components. Regular cleaning prevents dust buildup and ensures smooth operation. Always unplug the machine before cleaning for safety.
8.2 Storing the Machine Properly
Store your handheld sewing machine in a cool, dry place away from direct sunlight. Use the original packaging or a protective case to prevent damage. Keep it out of reach of children and pets. Ensure the machine is turned off and unplugged before storage. This preserves battery life and maintains functionality for future use.
8.3 Replacing Parts
Refer to your handheld sewing machine’s manual for specific part replacement instructions. Common replacements include needles, threaders, and belts. Ensure all power is off before starting. Use compatible parts to maintain performance. Contact the manufacturer or authorized dealers for genuine replacements. Proper installation ensures optimal functioning and safety. Regularly check and replace worn parts to prevent machine damage.
Advanced Techniques
Explore decorative stitching, reverse sewing, and fabric layering. Use advanced modes for intricate designs and heavier materials. Practice precision stitching for professional results.
9.1 Sewing Different Fabrics
Handheld sewing machines can handle various fabrics, from delicate silk to thick denim. For heavier materials, use a heavier needle and adjust tension settings. When sewing stretchy fabrics, reduce speed and use a zigzag stitch. Always pre-test fabric compatibility and use stabilizing materials like interfacing for better results. This ensures smooth stitching across diverse textiles.
9.2 Creating Decorative Stitches
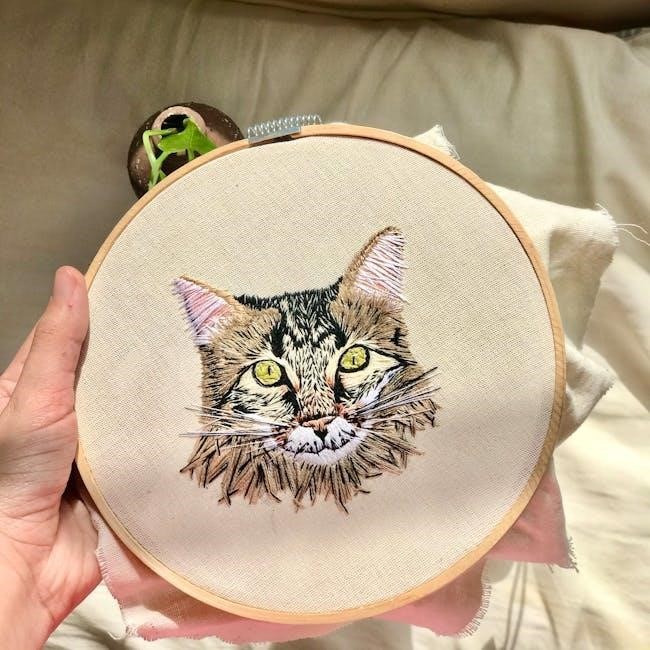
Handheld sewing machines allow for creative stitching by selecting different stitch modes, such as straight or zigzag. Experiment with thread colors and fabric types to enhance visual appeal. For intricate patterns, adjust the machine’s speed and tension. Use scrap fabric to test designs before finalizing. This feature makes handheld machines versatile for both functional and artistic sewing projects, adding a personal touch to your creations.
9.3 Reverse Sewing
Reverse sewing on a handheld machine enhances stitch security by sewing backward. Engage this feature by moving the mode selector to reverse or pressing a dedicated button. This is ideal for reinforcing seams or preventing unraveling. Ensure the machine is unlocked and properly threaded before starting. Practice on scrap fabric to master the technique, ensuring even tension for professional-looking results.
Comparison with Other Sewing Machines
Handheld sewing machines are portable, easy to use, and ideal for quick repairs. Unlike desktop models, they are cordless, making them perfect for small, on-the-go tasks.
10.1 Handheld vs. Desktop Sewing Machines
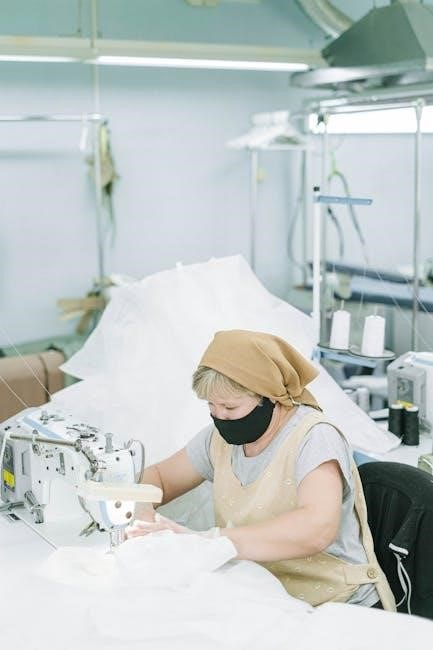
Handheld sewing machines are portable, lightweight, and ideal for small repairs, while desktop machines are more powerful and suitable for large-scale projects. Handheld machines are cordless, offering convenience, while desktop models provide stability and advanced features. Choose handheld for quick fixes and desktop for heavy-duty sewing, depending on your needs and workspace.
10.2 Pros and Cons of Handheld Machines
Handheld sewing machines offer portability and ease of use, perfect for quick repairs and small projects. They are lightweight and cordless, making them ideal for on-the-go tasks. However, they may lack the power and versatility of desktop machines, struggling with thick fabrics and offering limited stitch options. Despite this, their convenience and affordability make them a great choice for casual sewers and DIY enthusiasts.
Mastery of a handheld sewing machine empowers users with the confidence to tackle repairs and small projects effortlessly. These portable tools offer unparalleled convenience, making them ideal for beginners and experienced sewers alike. While they may have limitations with heavy fabrics, their ease of use, versatility, and practicality ensure they remain a valuable addition to any sewing kit. Embrace the freedom of handheld sewing for efficient, on-the-go creativity!
Leave a Reply
You must be logged in to post a comment.