Oster Blender Manual: A Comprehensive Guide
This guide consolidates resources for Oster blenders, including downloadable manuals from the Internet Archive and safety instructions for various models.
Find specific model information, troubleshooting tips, and details on parts replacement to maximize your blending experience.
Oster blenders have a rich history, evolving from simple kitchen appliances to versatile tools for modern culinary needs. For decades, Oster has been a trusted brand, known for its durability and performance.
Accessing the correct manual is crucial for safe and effective operation. The Internet Archive provides a wealth of downloadable Oster blender manuals, including options for the Classic series and specific models like the 133093-005-000. Understanding your blender’s features and following safety guidelines, as outlined in these manuals, ensures optimal results and longevity.
These resources empower users to confidently utilize their Oster blender for smoothies, soups, and various food processing tasks.
Understanding Your Oster Blender Model
Identifying your specific Oster blender model is the first step to accessing the correct manual and maximizing its functionality. The model number is typically located on the underside of the blender base.
Oster offers diverse series, including Classic and Pro, each with unique features. Online resources, like the Internet Archive, allow you to search for manuals using this number. Knowing your model unlocks access to tailored instructions, parts lists, and troubleshooting advice.
Referencing the appropriate manual ensures you understand your blender’s capabilities and operate it safely and efficiently.
Safety Precautions
Prioritize safety when operating your Oster blender. Always ensure the container is securely attached to the base before use. Never operate the blender without the lid properly in place to prevent splattering.
Disconnect the blender from the power outlet before disassembly or cleaning. Be cautious of sharp blades during cleaning. Always hold the container while blending, as detailed in user manuals.
Review the provided safety instructions in your specific model’s manual for comprehensive guidance and to avoid potential hazards;
General Safety Warnings
Read all instructions carefully before using your Oster blender. Avoid operating the appliance if the cord or plug is damaged. Never immerse the blender base in water or other liquids.
Close supervision is necessary when the blender is used near children. Do not operate the blender unattended. Always unplug the blender when not in use and before cleaning.
Use caution when blending hot liquids, as they can cause pressure buildup and potential burns. Refer to your model’s manual for specific safety guidelines.
Important Electrical Safety Information
To reduce the risk of electric shock, do not operate the blender with a damaged cord or plug. Never attempt to repair the appliance yourself; seek qualified service personnel. Ensure the voltage of your outlet matches the blender’s specifications.
Avoid using extension cords if possible; if necessary, use a heavy-duty extension cord. Always unplug the blender before cleaning or when not in use. Do not operate the blender outdoors or in damp environments.
Grounding is essential for electrical safety; do not tamper with the grounding plug.
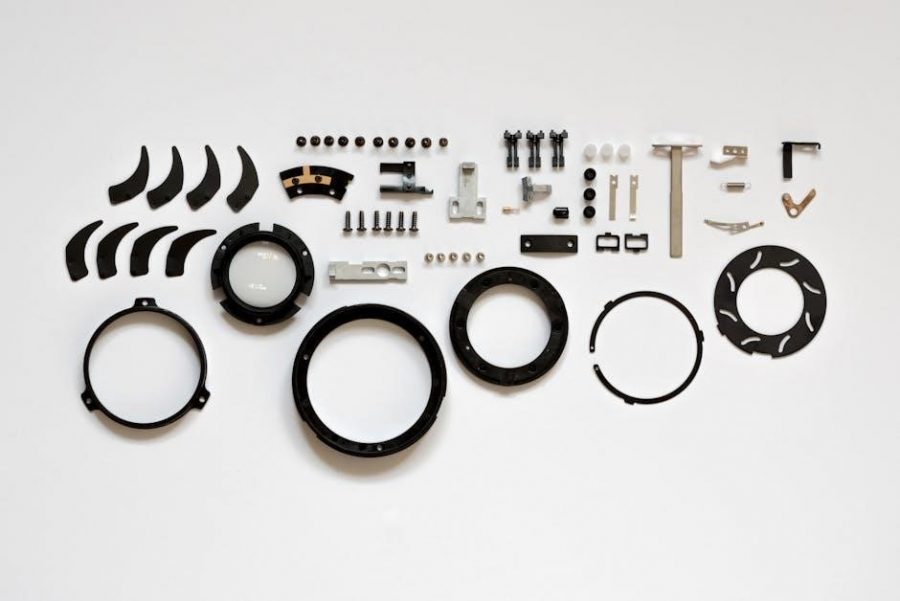
Parts Identification
Your Oster blender consists of several key components. These include the blender base, housing the motor and controls, and the container, typically glass or plastic, designed for blending ingredients. A secure lid assembly prevents splashing during operation.
Blades, located at the container’s base, perform the blending action. A coupling connects the blade assembly to the motor. Familiarize yourself with each part for proper assembly, operation, and maintenance. Refer to diagrams in your specific model’s manual.

Blender Base Components
The blender base houses the powerful motor responsible for driving the blades. It includes control buttons or a dial for selecting blending speeds, and often a pulse function for short bursts of power. A coupling within the base connects to the blade assembly.
Ensure the base is stable and positioned on a level surface. Ventilation openings prevent overheating during prolonged use. The base’s underside typically displays the model number for identification and manual lookup.
Container and Lid Assembly
The Oster blender container, often glass or durable plastic, securely holds ingredients during blending. It features measurement markings for precise ingredient addition. A blade assembly, crucial for processing, is permanently fixed within the container.
The lid creates a seal to prevent splattering and ensures safe operation. Some lids include a removable center cap for adding ingredients mid-blend. Proper alignment of the container onto the base is vital for secure locking and operation.
Setting Up Your Oster Blender
Before first use, thoroughly wash the container, lid, and blade assembly with warm, soapy water. Rinse and dry completely. Ensure the blender base is placed on a stable, level surface, away from water sources. Verify the container is properly seated and locked onto the base before operation.
Inspect the power cord for any damage. Avoid using extension cords if possible; if necessary, use a heavy-duty cord. Initial setup ensures optimal performance and longevity of your Oster blender.
Initial Cleaning Procedure
Upon unboxing, disassemble the blender container – remove the blade assembly and lid. Wash all components with warm, soapy water, paying close attention to the blade area. Rinse thoroughly to remove all soap residue. The glass jar is often dishwasher safe, but verify your model’s manual.
Wipe down the blender base with a damp cloth. This initial cleaning removes any manufacturing residue and prepares the blender for safe and effective use. Ensure all parts are completely dry before reassembling.
Proper Placement and Stability

Position your Oster blender on a flat, stable, and dry surface. Ensure sufficient clearance around the blender to allow for safe operation and prevent accidental contact. Avoid placing it near the edge of countertops or where it could be easily knocked over.
A stable base is crucial during blending, especially with heavier ingredients. Check that the blender base doesn’t wobble; if it does, adjust its position. Never operate the blender if it feels unstable, as this could lead to spills or damage.
Operating Instructions

Before operation, always ensure the container is securely attached to the base. Add ingredients following recipe instructions, avoiding overfilling. Start with a low speed and gradually increase as needed for optimal blending. Utilize the pulse function for short bursts of power, ideal for chopping or controlled mixing.

Familiarize yourself with the speed control settings to achieve desired textures. Hold the container during operation, especially at higher speeds, for stability and safety. Never blend hot liquids without proper ventilation.
Basic Blending Techniques
For smooth results, layer ingredients strategically – liquids first, then soft solids, and finally ice or frozen items. Begin blending on a low speed to combine ingredients, then gradually increase to high for a consistent texture. Use the manual speed setting for precise control, blending until the desired consistency is reached.
Stop and scrape down the sides of the container if necessary to ensure all ingredients are incorporated. Avoid over-blending, as it can alter the texture and potentially overheat the motor.
Pulse Function Explained
The pulse function delivers short bursts of power, providing maximum control over the blending process. Ideal for chopping, crushing ice, or creating textured blends, it prevents over-processing. Engage the pulse by pressing and holding the button – release for immediate stopping.
Use short pulses initially, then increase duration as needed. This technique is particularly useful for delicate ingredients or achieving a chunky consistency. Avoid prolonged pulsing to prevent motor strain and ensure optimal performance.
Speed Control Settings
Oster blenders typically feature multiple speed settings, offering versatility for various blending tasks. Lower speeds are best for delicate mixtures like dressings or sauces, preventing splattering and ensuring even consistency. Medium speeds excel at combining ingredients for smoothies or pureeing cooked vegetables.
Higher speeds are designed for crushing ice, making frozen drinks, or achieving a completely smooth texture. Experiment with settings to find the optimal speed for each recipe, and always start low to avoid overwhelming the motor.
Recipes and Usage Ideas
Unlock your Oster blender’s potential with a diverse range of recipes! Smoothies and frozen drinks are a classic application, easily customizable with fruits, vegetables, and liquids. Explore soups and sauces, effortlessly pureeing cooked ingredients for velvety textures;
Beyond beverages, utilize your blender for food processing tasks like chopping nuts, making breadcrumbs, or creating dips. Experiment with different ingredients and blending times to discover new culinary creations!
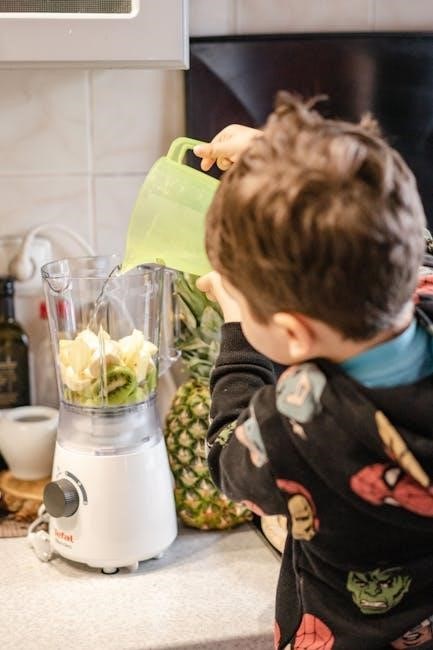
Smoothies and Frozen Drinks
Oster blenders excel at creating perfectly smooth smoothies and refreshing frozen drinks. Begin by layering ingredients – liquids first, then soft fruits, followed by frozen items and ice. Utilize the pulse function for controlled crushing of ice, preventing motor strain.
Experiment with various fruits, vegetables, yogurts, and juices to customize flavors. For thicker smoothies, use less liquid or add frozen banana. Blend on manual speed until desired consistency is achieved.
Soups and Sauces
Oster blenders are versatile tools for crafting delicious soups and sauces. For hot soups, ensure adequate ventilation by removing the center piece of the lid and covering with a towel to prevent splattering. Start on a low speed and gradually increase to avoid mess.
Blend cooked vegetables with broth for creamy soups. Use the pulse function for chunkier textures. For sauces, blend ingredients until smooth, adjusting liquid for desired consistency. Always follow safety guidelines when blending hot liquids.
Food Processing Applications

Oster blenders extend beyond blending; they function as basic food processors. Utilize pulse settings for chopping vegetables, creating salsas, or making breadcrumbs from stale bread. Be mindful of ingredient size – smaller pieces blend more evenly.
Avoid over-processing to prevent pastes. For nut butters, blend for an extended period, pausing to scrape down the sides. Always adhere to safety precautions when processing solid foods, and never overload the container.
Cleaning and Maintenance
Regular cleaning ensures optimal performance and longevity of your Oster blender. Begin by disassembling the container, lid, and blade assembly. Many parts are dishwasher safe – check your model’s manual for confirmation. For manual cleaning, use warm, soapy water and a soft sponge.
Avoid abrasive cleaners that can damage the surfaces. Thoroughly rinse and dry all components before reassembling. Never immerse the blender base in water; wipe it clean with a damp cloth.
Disassembly for Cleaning
Before cleaning, always unplug your Oster blender. Carefully remove the container from the base. Depending on your model, the blade assembly may detach – consult your manual for specific instructions. Some lids disassemble into separate parts for thorough cleaning.
Exercise caution when handling the blades as they are sharp. Ensure all parts are securely disconnected before washing. Proper disassembly allows for effective removal of food residue and prevents bacterial growth.
Dishwasher Safe Parts
Many Oster blender components are designed for dishwasher convenience. Typically, the container, lid, and removable blade assembly (if applicable to your model) can be safely washed on the top rack. However, always verify your specific model’s manual to confirm dishwasher compatibility.
Avoid placing the blender base or any parts with electrical components in the dishwasher. High temperatures can damage these parts. Regularly checking the manual ensures safe and effective cleaning practices.
Manual Cleaning Instructions
For manual cleaning, immediately after use, unplug the blender and disassemble removable parts. Wash the container, lid, and blade assembly with warm, soapy water. Rinse thoroughly and allow to air dry. Never immerse the blender base in water; wipe it clean with a damp cloth.
Stubborn food residue may require soaking or gentle scrubbing. Avoid abrasive cleaners that could scratch the surfaces. Proper manual cleaning maintains hygiene and extends the blender’s lifespan.
Troubleshooting Common Issues
If your Oster blender won’t turn on, ensure it’s properly plugged in and the lid is securely fastened. Motor overheating can occur with prolonged use; allow it to cool down before resuming. Leaking containers often result from improper assembly or worn seals.
Check the blade assembly for damage and ensure all parts are correctly aligned. Refer to the manual for specific troubleshooting steps related to your model.
Blender Won’t Turn On
If your Oster blender fails to power on, first verify the unit is securely plugged into a functioning electrical outlet. Confirm the lid is firmly locked onto the blender container, as a safety mechanism prevents operation without proper closure. Inspect the base for any visible damage.
Check the circuit breaker or fuse box to rule out electrical issues. Consult your model’s manual for specific reset instructions if applicable.
Motor Overheating Problems
If your Oster blender’s motor overheats, immediately unplug the unit and allow it to cool completely – typically 30-60 minutes. Overheating often results from prolonged use, blending excessively thick mixtures, or insufficient liquid. Avoid continuous operation; utilize the pulse function for short bursts.
Reduce the blending load by processing ingredients in smaller batches. Ensure adequate ventilation around the blender base. Refer to your manual for specific overheating protection features.
Leaking Container Solutions

If your Oster blender container leaks, first ensure the sealing ring is correctly positioned within the lid. Inspect the ring for cracks or damage and replace if necessary. Verify the lid is securely fastened to the container, achieving a tight seal.
Avoid overfilling the container, as this can cause spillage. Check for cracks in the container itself; damaged containers should be replaced. Proper assembly is crucial to prevent leaks during operation.
Warranty Information
Oster blenders typically come with a limited warranty covering defects in materials and workmanship. The warranty period varies by model, often ranging from one to ten years for the main unit and a shorter duration for parts and accessories.
To make a warranty claim, retain your proof of purchase and contact Oster customer support. The warranty does not cover damage from misuse, accidents, or unauthorized repairs. Review your specific model’s warranty details for complete coverage information.
Finding Your Specific Oster Blender Manual
Locating the correct manual begins with identifying your blender’s model number, usually found on the underside of the base. Once you have this number, you can search for the manual online through the Internet Archive or the Oster website.
Resources like “The Manual Library” offer downloadable PDFs. Alternatively, searching directly for “Oster Blender [model number] manual” will yield relevant results. Ensure the manual matches your specific model for accurate instructions.
Locating the Model Number
The Oster blender model number is crucial for finding the correct manual and replacement parts. Typically, this number is printed on a sticker located on the bottom of the blender base. Carefully inspect the underside, looking for a series of numbers and letters – for example, 133093-005-000.
This alphanumeric code uniquely identifies your blender model. Record this number before proceeding with your search for online resources or contacting customer support.
Online Manual Resources
Numerous online platforms offer downloadable Oster blender manuals. The Internet Archive is a valuable resource, hosting PDF versions of manuals for various models, including the Classic series and specific numbers like 133093-005-000.
These archives often include multiple formats (PDF, JP2, TORRENT) for convenient access. “The Manual Library” is another collection to explore. Always verify the manual matches your blender’s model number for accurate instructions and safety information.
Oster Blender Model Variations
Oster offers a diverse range of blenders, categorized into series like the Classic and Pro Series. The Classic Series represents traditional designs, while the Pro Series boasts enhanced features and power.
Specific models, such as those detailed in available manuals, cater to different needs – from basic blending to more complex food processing. Understanding these variations is crucial when searching for the correct manual and replacement parts, ensuring optimal performance.
Classic Series Overview
The Oster Classic Series embodies simplicity and reliability, offering essential blending functionality for everyday tasks. These models, often covered in readily available user manuals, typically feature straightforward controls and durable construction.
They are ideal for basic blending, chopping, and pureeing, providing a cost-effective solution for common kitchen needs. Finding the correct manual – easily downloadable from resources like the Internet Archive – ensures safe and efficient operation of these time-tested blenders.
Pro Series Features
Oster Pro Series blenders represent a step up in power and versatility, often detailed in comprehensive downloadable manuals. These models boast robust motors capable of handling tougher ingredients like ice and frozen fruits with ease.
Key features include pre-programmed settings for smoothies, soups, and more, alongside advanced speed control options. Accessing the specific Oster Pro Series manual is crucial for understanding and utilizing these features effectively, ensuring optimal blending performance and longevity.

Advanced Blending Techniques
Mastering advanced blending with your Oster requires understanding ingredient layering. Begin with liquids, then soft solids, and finish with frozen items or ice for optimal vortex creation. Experiment with pulse function for controlled chopping and texture adjustments, as detailed in your Oster manual.
Achieving varied textures—from silky smooth purees to chunky salsas—depends on speed control and blending duration. Refer to recipe-specific guidance within the manual for precise instructions and unlock your blender’s full potential.
Layering Ingredients for Optimal Results
Strategic ingredient layering is crucial for efficient blending. Begin by adding liquids directly to the Oster blender jar; this creates a base for vortex formation. Follow with softer ingredients like yogurt or fruits, then add leafy greens.
Finally, introduce frozen items or ice on top. This prevents the blades from getting stuck and ensures even processing. Consult your Oster manual for specific recommendations based on your model and desired consistency.
Achieving Different Textures
Your Oster blender’s speed control is key to texture mastery. For smooth purees and liquids, utilize higher speeds and longer blending times. Pulse functionality offers coarse chopping – ideal for salsas or pestos – providing controlled bursts of power.
Lower speeds are perfect for gently mixing or incorporating delicate ingredients. Refer to your Oster blender manual for specific speed settings and recommended blending durations to achieve your desired results consistently.
Replacing Parts
Maintaining your Oster blender often requires replacing worn components. Common replacements include jars, lids, and blade assemblies. Locate authorized retailers or the Oster website for genuine parts, ensuring compatibility with your specific model number.
Always disconnect the blender before attempting any part replacement. Consult your Oster blender manual for detailed instructions and diagrams. Utilizing compatible accessories extends the life and functionality of your appliance, guaranteeing optimal performance.
Where to Purchase Replacement Parts
Genuine Oster replacement parts are crucial for maintaining blender performance and safety. You can find them directly on the Oster official website, ensuring correct fit and quality. Authorized retailers like appliance parts stores and major department stores also stock common components.
Online marketplaces offer a wide selection, but verify seller credibility. Always have your model number handy when ordering to guarantee compatibility. Prioritize genuine Oster parts to avoid voiding your warranty.
Compatible Accessories
Oster blenders boast a range of compatible accessories to expand functionality. These include additional jars – glass or Tritan plastic – for varied blending needs. Food processing attachments transform your blender into a versatile kitchen tool, handling chopping and slicing.
Individual blade assemblies are available for replacement, and travel cups offer on-the-go convenience. Ensure accessory compatibility with your specific Oster model before purchasing, checking the Oster website or retailer details.
Understanding the Oster Brand
Oster’s history stretches back to 1923, initially specializing in universal motors before revolutionizing food preparation with blenders. The brand quickly became synonymous with durability and innovation, offering reliable kitchen appliances for generations.
Oster’s commitment to quality remains central, focusing on performance and user satisfaction. They continually refine designs and incorporate new technologies, solidifying their position as a trusted name in blending and food processing.
History of Oster Blenders
Oster’s journey into blending began with its expertise in electric motors. In 1923, the company initially focused on manufacturing universal motors, a crucial component in many appliances. The first Osterizer blender emerged in the 1940s, quickly gaining popularity for its ability to efficiently liquefy ingredients.
These early blenders were marketed as milkshake machines, but soon expanded to handle a wider range of culinary tasks. Oster continued innovating, introducing new features and designs that cemented its place as a leader in the blender market.
Oster’s Commitment to Quality
Oster consistently prioritizes durability and performance in its blender designs. This dedication is reflected in the robust construction of their appliances and the use of high-quality materials. The brand focuses on creating blenders that withstand frequent use, offering long-lasting reliability for consumers;
Oster also emphasizes safety features, ensuring user protection during operation. Their commitment extends to providing accessible support, including comprehensive manuals and readily available replacement parts, enhancing the overall customer experience.