Month: July 2024 Page 1 of 2

keurig k 70 owners manual

The Keurig K70 is a single-serve coffee maker with a one-touch control panel, blue LCD display, and programmable features for convenient brewing. It offers adjustable brew sizes, ensuring a perfect cup every time, making it a popular choice for coffee lovers seeking efficiency and ease.

1.1 Overview of the Keurig K70 Coffee Maker

The Keurig K70 is a sleek, single-serve coffee maker designed for convenience and versatility. It features a one-touch control panel, a blue backlit LCD display, and programmable options like auto-on/off. With five brew size options, it caters to varying preferences, ensuring a perfect cup every time. Its compact design and user-friendly interface make it an ideal choice for home or office use, suiting both casual and avid coffee drinkers.

1.2 Importance of the Owner’s Manual

The owner’s manual is essential for understanding the Keurig K70’s features, operation, and maintenance. It provides step-by-step guides for setup, brewing, and troubleshooting, ensuring optimal performance. Regular maintenance instructions, like descaling and cleaning, are outlined to prolong the machine’s lifespan. Referencing the manual helps users resolve common issues and customize their brewing experience effectively. It’s a vital resource for both new and experienced users.

Unboxing and Initial Setup

The Keurig K70 comes with a water reservoir, K-cup holder, and power cord. Initial setup involves rinsing the machine and priming it for first use.

2.1 What’s Included in the Box

The Keurig K70 box includes the coffee maker, a 40-ounce water reservoir, a K-Cup holder, a power cord, and a user manual. Additional items like a water filter starter kit may be included for optimal performance. Ensure all components are accounted for before setup. Read the manual for guidance on each part’s purpose and installation.

2.2 Step-by-Step Setup Instructions

Place the Keurig K70 on a flat surface and plug in the power cord. Remove packaging materials and rinse the water reservoir. Install the water filter according to the manual. Fill the reservoir with fresh water and replace it. Perform a cleansing brew by running a cycle without a K-Cup to prime the machine. Your Keurig is now ready for use.

Basic Operation and Controls

The Keurig K70 features a user-friendly control panel with a blue LCD display, one-touch buttons, and a digital clock. It allows easy selection of brew size and strength.

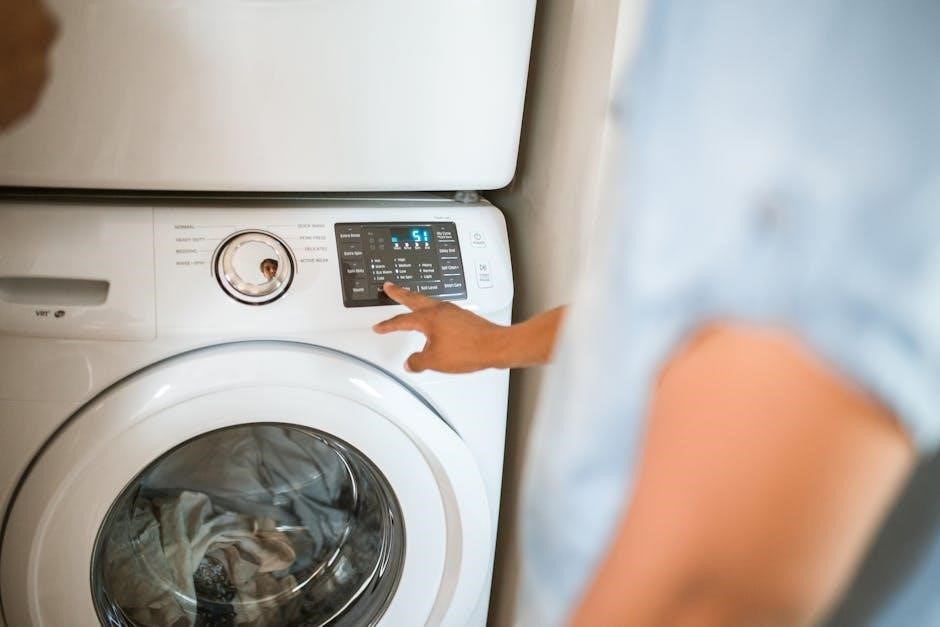
3.1 Understanding the Control Panel

The Keurig K70’s control panel offers intuitive navigation with a blue LCD display and one-touch buttons. It allows users to adjust brew size, select the strong brew option, set the digital clock, and program the auto-on/off feature. The panel is backlit for easy visibility and simplifies the brewing process with clear, concise controls.

3.2 Brewing Your First Cup

To brew your first cup, insert a K-Cup pod into the machine, ensuring it clicks securely. Select your desired brew size using the control panel and choose the strong brew option if preferred. The Keurig K70 will heat the water and begin brewing automatically. Once complete, remove the K-Cup and discard it. The machine will turn off after 2 hours if not in use, saving energy.

Cleaning and Maintenance

Regular maintenance ensures optimal performance. Rinse the brew head and water reservoir daily. Use Keurig’s descaling solution periodically to prevent mineral buildup and maintain functionality.

4.1 Daily Cleaning Tips

Daily cleaning is essential for maintaining your Keurig K70. After each use, rinse the brew head under warm water and wipe down the exterior with a damp cloth. Empty and clean the drip tray regularly to prevent overflow and bacteria buildup. Additionally, ensure the water reservoir is cleaned weekly to avoid mineral deposits and contamination. This routine will keep your machine in prime condition.

4.2 Descaling the Keurig K70

Descaling your Keurig K70 is crucial to remove mineral buildup. Use a Keurig Descaling Solution or vinegar. Run the solution through the machine without a K-Cup, then rinse thoroughly with clean water. Repeat if necessary. This process ensures optimal performance and prevents clogs. Descaling should be done every 3-6 months, depending on usage and water hardness. Regular maintenance keeps your brewer functioning efficiently.

Customizing Your Brewing Experience

The Keurig K70 allows you to tailor your coffee experience with adjustable brew sizes and a Strong Brew option for bolder flavors, ensuring every cup meets your preference.

5.1 Adjusting Brew Size

The Keurig K70 offers adjustable brew sizes, allowing users to select from various options to customize their coffee experience. By choosing smaller sizes, you can achieve a more concentrated flavor, while larger sizes provide a milder taste. This feature ensures every cup is tailored to personal preference, enhancing the overall brewing experience with ease and convenience.

5.2 Using the Strong Brew Option

The Keurig K70 features a Strong Brew option for those who prefer a bolder cup. By pressing the Strong button before selecting your brew size, the machine adjusts to deliver a more intense flavor. This option is perfect for darker roasts or those who enjoy a robust coffee experience, ensuring a richer taste with minimal effort.

Troubleshooting Common Issues

Common issues with the Keurig K70 include the machine not turning on, water flow problems, or inconsistent brewing. Check power connections, ensure proper water reservoir alignment, and descale regularly to prevent mineral buildup. Refer to the manual for detailed solutions or contact Keurig customer service for assistance.

6.1 Why Your Keurig K70 Might Not Be Brewing

Your Keurig K70 may not brew due to power issues, empty water reservoir, or clogged needles. Ensure the machine is plugged in and the reservoir has water. Check for blockages in the K-Cup holder and descale regularly to remove mineral buildup. If problems persist, consult the manual or contact Keurig support for further troubleshooting assistance.

6.2 Resolving Water Flow Problems

Water flow issues in your Keurig K70 can often be fixed by descaling or cleaning the machine. Mineral buildup or debris may block the water flow. Use Keurig’s descaling solution and follow the manual’s instructions to clean the internal parts. Ensure the water reservoir is properly aligned and filled. If the problem persists, check for kinks in the water tubes or contact customer support for assistance.

Accessories and Replacement Parts

Explore Keurig-approved accessories like water filters, K-Cup storage, and replacement parts to enhance your brewing experience. Genuine parts ensure optimal performance and longevity of your machine.

7.1 Compatible K-Cup Pods

The Keurig K70 works seamlessly with a wide variety of K-Cup pods, offering hundreds of flavor options. For optimal performance and taste, use genuine Keurig-approved pods. These pods are designed to ensure proper fit and extraction, delivering consistent results. Always check compatibility to avoid issues. Regularly cleaning the pod bay and descaling the machine with Keurig’s solution can prevent mineral buildup and maintain performance.

7.2 Where to Find Genuine Keurig Parts

Genuine Keurig parts, such as water filters and replacement components, can be found directly through Keurig’s official website or authorized retailers. These parts ensure compatibility and maintain your machine’s performance. For convenience, Keurig also offers customer support to help locate specific parts. Always verify authenticity to avoid counterfeit products and ensure warranty coverage. This guarantees optimal functionality and longevity of your Keurig K70.

Warranty and Customer Support

Keurig offers a one-year limited warranty for the K70 model, covering defects in materials and workmanship. For assistance, contact Keurig’s toll-free customer service at 1.866.901.BREW (2739).

8.1 Understanding Your Warranty

The Keurig K70 is backed by a one-year limited warranty covering manufacturing defects. This ensures repairs or replacements for faulty parts, excluding misuse or normal wear. For warranty claims, contact Keurig’s customer service at 1.866.901.BREW (2739). Proper registration and adherence to usage guidelines are essential to maintain warranty validity and enjoy uninterrupted service.

8.2 Contacting Keurig Customer Service

For assistance with your Keurig K70, contact customer service at 1.866.901.BREW (2739). Their support team is available to help with troubleshooting, warranty claims, or replacement parts. When reaching out, have your model number and purchase details ready for efficient service. Keurig’s team is dedicated to resolving issues promptly and ensuring a seamless brewing experience.

Advanced Features and Settings

The Keurig K70 offers programmable on/off, a digital clock, and customizable brew strength. Use the strong brew option for bolder coffee and adjust settings to suit your preferences.

9.1 Programming the Auto-On/Off Feature

The Keurig K70 allows you to program the Auto-On/Off feature, enabling your coffee maker to turn on and off automatically. This convenient setting ensures your machine is ready when you need it and conserves energy when not in use. Simply navigate through the digital clock menu, set your preferred times, and enjoy the added efficiency and energy savings.

9.2 Navigating the Digital Clock and Timer

The Keurig K70 features a digital clock and timer, allowing you to set specific times for brewing. To navigate, press the “Menu” button and use the arrows to adjust hours and minutes. The timer ensures your coffee is ready when you want it, while the clock helps you stay on schedule. This feature enhances convenience and streamlines your morning routine.

Tips for Optimal Performance

For optimal performance, use filtered water, descale regularly, and store K-Cups in a cool, dry place. Clean the machine after each use to prevent mineral buildup.

10.1 Choosing the Right Water Quality

Using filtered or bottled water is recommended for optimal taste and to prevent mineral buildup. Avoid tap water with high mineral content, as it can cause scaling and affect performance. Regularly cleaning and descaling your Keurig K70 ensures longevity and maintains water flow. Poor water quality can lead to bitter-tasting coffee, so always use fresh, clean water for the best brewing results.

10.2 Storing and Caring for Your K-Cups

Store K-Cups in a cool, dry place away from direct sunlight and moisture. Avoid extreme temperatures to preserve flavor and aroma. Use K-Cups within six months of opening to ensure optimal taste. Handle them gently to prevent punctures or damage. Always close the storage container tightly and keep it clean to maintain freshness and prevent contamination. This ensures your coffee remains flavorful and your Keurig K70 performs at its best.

The Keurig K70 is a reliable and efficient coffee maker, offering a variety of flavors with minimal effort. Its durability and customer support ensure long-term satisfaction.

11.1 Final Thoughts on the Keurig K70

The Keurig K70 is a versatile and efficient coffee maker, offering a seamless brewing experience with its programmable features and adjustable settings. Its durability and ease of maintenance make it a long-term investment for coffee enthusiasts. By following the owner’s manual, users can maximize its performance and enjoy a perfect cup every time. Regular cleaning and descaling ensure optimal functionality and flavor.

tlso brace instructions pdf

A TLSO brace is a supportive device designed to limit motion in the thoracic, lumbar, and sacral areas, commonly prescribed for spinal fractures or post-surgery recovery.

1.1 What is a TLSO Brace?

A TLSO (Thoracic-Lumbar-Sacral Orthosis) brace is a rigid, full-torso orthopedic device designed to provide stability and support for the thoracic, lumbar, and sacral regions of the spine. It is typically prescribed for spinal fractures, post-surgical recovery, or conditions requiring motion restriction. The brace is custom-made to fit the patient’s body, ensuring proper alignment and immobilization of the spine to promote healing and prevent further injury.

1.2 Importance of Proper TLSO Brace Usage

Proper use of a TLSO brace is essential for achieving optimal spinal stability, promoting healing, and preventing complications. Correct usage ensures the brace functions effectively, providing the necessary support and immobilization. Adhering to instructions helps maintain proper posture, reduces discomfort, and enhances the brace’s ability to facilitate recovery and protect the spine during vulnerable periods.

Key Components of a TLSO Brace

A TLSO brace includes rigid panels, adjustable straps, and padded liners, designed to provide structural support and immobilization for the thoracic, lumbar, and sacral spine regions.

2.1 Materials and Design Features

TLSO braces are typically made from high-quality, durable materials such as rigid plastics and breathable fabrics. They feature adjustable straps for customizable fit, padded liners for comfort, and a sturdy frame to immobilize and support the spine. The design includes a front chest pad and a back panel, ensuring proper alignment and stability for the thoracic, lumbar, and sacral regions.

2.2 Adjustable Straps and Fastening Mechanisms

TLSO braces feature adjustable straps and secure fastening mechanisms, such as buckles or Velcro, to ensure a customizable fit. These straps allow for precise tightening, starting from the lower sections and moving upward, to provide optimal spinal alignment and support. Regular adjustments may be needed to maintain comfort and effectiveness, with proper care taken to clean and maintain the straps.

Fitting and Adjustment Instructions

Proper fitting involves tightening straps from bottom to top, ensuring snug support without discomfort. Adjustments should be made while standing or sitting upright for optimal alignment.

3.1 Initial Fitting Process

The initial fitting requires lying flat on a firm surface, log rolling onto one side to slide the brace under the body. Ensure proper alignment of the TLSO with the spine, adjusting straps for snugness. Assistance is recommended for accurate placement and to prevent misalignment. Proper positioning ensures optimal support and comfort during recovery.

3.2 How to Tighten and Adjust the Brace

Tighten the TLSO brace by securing the bottom straps first, then the middle, and finally the top straps. Ensure a snug fit while sitting or standing upright. Adjustments should be made to avoid discomfort or restricted breathing. Avoid overtightening, as this can impede circulation or cause pain. If unsure, consult a healthcare professional for proper adjustment guidance.

Wearing Instructions for TLSO Brace

Put on the TLSO brace while lying flat, log rolling onto your side to slide it under you. Wear it snugly during activities to maintain proper spinal alignment.

4.1 Putting on the Brace

To put on the TLSO brace, lie flat on your back and log roll onto your side. Slide the brace under your body, ensuring it is centered and aligned properly. Tighten the straps gradually, starting from the bottom and moving upward, to achieve a snug and comfortable fit. Adjust the chest pad to sit two finger widths below your collarbone notch for proper positioning.

4.2 Proper Posture and Movement While Wearing

Maintain proper posture by sitting in a firm, high-backed chair and avoiding twisting or bending. Keep your spine straight and engage your core for support. The TLSO brace limits movement, so be mindful of your actions to prevent strain. When moving, log roll onto your side and use assistance if needed. Avoid activities that require heavy lifting or excessive bending to ensure the brace functions effectively.

Care and Maintenance of TLSO Brace

Regularly clean the TLSO brace with mild soap and water, avoiding harsh chemicals. Allow it to air dry thoroughly. Store in a cool, dry place to maintain its structure and hygiene.

5.1 Cleaning the Brace

Clean the TLSO brace regularly using mild soap and warm water. Dampen a clean washcloth, gently scrub all surfaces, and rinse thoroughly. Pat dry with a towel and allow it to air dry completely. Avoid harsh chemicals, abrasive materials, or soaking the brace. Ensure no moisture remains to prevent damage or odor buildup. Follow manufacturer-specific cleaning instructions if provided.

5.2 Storage and Transport Tips

Store the TLSO brace in a cool, dry place away from direct sunlight. When not in use, keep it in a protective case to prevent damage. During transport, ensure the brace is securely positioned to avoid bending or twisting. Handle with care to maintain its structural integrity and proper function. Always follow manufacturer guidelines for storage and transportation.

Precautions and Safety Guidelines

Avoid twisting or bending while wearing the TLSO brace. Sit in a firm, high-backed chair and minimize activities that strain your back. Do not lie flat without proper support.

6.1 General Precautions for TLSO Brace Wearers

Always avoid twisting or bending while wearing the TLSO brace. Sit in a firm, high-backed chair to maintain proper posture. Do not lie flat on your back without additional support. Use pillows as directed by your healthcare provider to maintain spinal alignment. Avoid removing any parts of the brace without professional guidance. Follow cleaning and maintenance instructions carefully to ensure hygiene and structural integrity. Never wear the brace while lying flat in bed unless specified by your doctor. Adhere strictly to the provided guidelines to prevent complications and ensure effective support. If any discomfort or issues arise, contact your healthcare provider immediately. Do not stop wearing the brace without medical advice, as it may compromise your spinal stability.

6.2 Specific Activities to Avoid

Avoid heavy lifting, bending, or twisting while wearing the TLSO brace. Refrain from high-impact activities like running or jumping. Do not engage in sports or exercises that involve sudden movements. Avoid sitting for prolonged periods without proper back support. Do not bend forward beyond a 30-degree angle unless instructed. Steer clear of activities that cause discomfort or strain on your spine. If unsure, consult your healthcare provider for personalized advice.

Common Issues and Troubleshooting

Common issues include discomfort, skin irritation, or a too-tight fit. Troubleshoot by loosening straps, adjusting position, or consulting a healthcare provider for proper adjustments.

7.1 Addressing Discomfort or Skin Irritation

If discomfort or skin irritation occurs, ensure the brace fits properly and isn’t too tight. Clean the area regularly, avoid irritants, and wear breathable clothing. If issues persist, consult your healthcare provider for adjustments or padding solutions to alleviate discomfort and prevent skin breakdown.

7.2 What to Do if the Brace Feels Too Tight

If the TLSO brace feels too tight, first ensure proper strap tightening order: bottom, middle, then top. If discomfort persists, consult your healthcare provider for professional adjustment or additional padding. Monitor skin for irritation and take regular breaks to relieve pressure. Proper fit is crucial for both support and comfort, so don’t hesitate to seek expert guidance if issues remain unresolved.

TLSO Brace and Daily Activities

The TLSO brace supports spinal stability during daily activities like sitting, walking, and light tasks. It promotes proper posture and reduces excessive movement, ensuring comfort and safety while wearing it.

8.1 Sleeping and Resting with the Brace

When sleeping, lie flat on your back with a supportive pillow under your head. Avoid twisting or bending, and keep your spine aligned. Remove the brace if instructed by your healthcare provider. Ensure the mattress is firm for optimal support. Resting while wearing the brace helps maintain spinal stability and promotes healing during recovery periods.

8.2 Showering and Hygiene Tips

Showering with the TLSO brace requires careful preparation. Lay the brace flat on a bed and log roll onto your back to remove it. Use mild soap and warm water to clean the brace, avoiding abrasive materials. Pat dry thoroughly after cleaning. For personal hygiene, use a washcloth to clean skin under the brace while it’s removed. Ensure the area is dry before reapplying the brace to prevent irritation. Always check for any damage or wear after cleaning.

Long-Term Use and Monitoring

Regular monitoring of the TLSO brace is crucial for long-term effectiveness. Schedule follow-ups with your healthcare provider to ensure proper fit and function over time.

9.1 Scheduled Follow-Up Appointments

Regular follow-up appointments with your healthcare provider are essential for monitoring the TLSO brace’s effectiveness. These visits ensure proper fit, address any discomfort, and assess spinal alignment. Your provider may adjust the brace or modify usage instructions based on progress. Adhering to scheduled appointments is crucial for optimal recovery and long-term spinal health.

9.2 Signs That the Brace May Need Adjustment

If you experience persistent discomfort, skin redness, or restricted movement, your TLSO brace may need adjustment. Look for signs like the brace feeling too tight or loose, or if it shifts position. Consult your healthcare provider promptly to ensure proper fit and spinal support, preventing potential complications and promoting effective recovery.

Adhering to TLSO brace instructions ensures optimal spinal support and recovery. Regular follow-ups and proper care are crucial for long-term effectiveness. Stay committed to your treatment plan for the best outcomes.

10.1 Summary of Key Points

A TLSO brace supports spinal stability, aids recovery, and prevents progression of spinal deformities. Proper fitting, regular adjustments, and consistent wear are essential. Cleaning, storage, and avoiding harmful activities ensure longevity. Follow instructions carefully to maximize effectiveness and achieve desired outcomes for your spinal health and recovery journey.

10.2 Encouragement for Adherence to Instructions

Consistently following TLSO brace instructions is crucial for optimal spinal support and recovery. Proper wear, regular cleaning, and avoiding prohibited activities ensure effectiveness. Attend follow-up appointments and communicate concerns promptly. Commitment to these guidelines enhances comfort, promotes healing, and helps achieve long-term spinal stability and overall well-being.

bifen i t insecticide mixing instructions

Bifen I/T is a broad-spectrum insecticide effective against various pests, including mosquitoes, aphids, and leaf miners․ It is a synthetic pyrethroid, modeled after natural insecticidal extracts, making it highly reliable for both indoor and outdoor use․ Its versatility and long-lasting effects make it a popular choice among professionals and homeowners for pest control․

1․1 Overview of Bifen I/T Insecticide

Bifen I/T is a synthetic pyrethroid insecticide designed for broad-spectrum pest control․ It targets pests like mosquitoes, aphids, and leaf miners, offering long-lasting residual activity․ Its formulation allows for versatile application, including indoor and outdoor use, making it a reliable choice for both agricultural and residential pest management․ Proper use ensures effective pest elimination while maintaining safety for non-target organisms when guidelines are followed․

1․2 Importance of Proper Mixing Instructions

Proper mixing of Bifen I/T is crucial for ensuring its effectiveness and safety․ Incorrect dilution can reduce pest control efficacy or pose risks to people, pets, and the environment․ Following the recommended mixing ratio guarantees optimal performance while minimizing potential hazards․ Adhering to the instructions helps maintain the product’s integrity and ensures targeted pest elimination without unnecessary exposure or contamination of surrounding areas․

Safety Precautions

Always wear protective clothing, gloves, and eyewear when handling Bifen I/T․ Avoid skin contact and inhalation of spray mist․ Keep the product away from pets and water sources to ensure safe application and environmental protection․

2․1 Personal Protective Equipment (PPE)

Wear long-sleeved shirts, pants, closed-toe shoes, chemical-resistant gloves, and protective eyewear when mixing or applying Bifen I/T․ A dust mask or respirator is recommended to avoid inhaling fine particles․ Ensure all PPE meets EPA standards for pesticide handling․ Wash clothing and shower immediately after use to prevent residual exposure․ Proper PPE use minimizes health risks and ensures safe application of the insecticide․

2․2 Handling and Storage Safety

Store Bifen I/T in a cool, dry, well-ventilated area away from direct sunlight and heat sources․ Keep the product out of reach of children, pets, and food supplies․ Avoid storing near open flames or sparks․ Ensure the container is tightly sealed after use․ Handle the product with care to prevent spills․ Dispose of empty containers according to local regulations to minimize environmental impact and ensure safety․

Mixing Instructions

  • Use a clean tank and water to mix Bifen I/T for optimal effectiveness․
  • Measure the recommended dose accurately to avoid overuse․
  • Fill the tank halfway with water, add the product, and mix thoroughly․
  • Avoid mixing errors by following the label instructions precisely․

3․1 Materials Needed for Mixing

To prepare Bifen I/T effectively, gather essential materials: a clean, sturdy mixing container, water source, measuring cup or scoop, stir stick, and protective gloves․ Ensure the container is free from contaminants to maintain the product’s potency and safety․ Always use clean water to prevent unintended chemical reactions or reduced efficacy during application․

3․2 Step-by-Step Mixing Process

Fill the mixing container halfway with water․ Add the recommended amount of Bifen I/T Insecticide, then stir thoroughly to ensure complete dissolution․ Top up the container with water to the desired volume and mix well properly․ Always follow the product label for specific mixing rates․ Allow the mixture to sit briefly before application for optimal effectiveness․

3․3 Common Mixing Mistakes to Avoid

Not following the label instructions precisely can lead to ineffective treatment․ Over- or under-dosing the product is a frequent error, potentially harming plants or reducing efficacy․ Mixing with contaminated water or failing to agitate the solution properly can also compromise performance․ Always allow the mixture to sit briefly before application to ensure optimal results and avoid uneven distribution of the active ingredients․

Application Guidelines

Apply Bifen I/T during early morning or late evening to avoid direct sunlight․ Target areas include gardens, lawns, and shrubs․ Always follow label instructions precisely․

4․1 Best Times for Application

Apply Bifen I/T during early morning or late evening to maximize effectiveness․ Avoid spraying under direct sunlight to prevent rapid evaporation․ Optimal weather conditions include calm winds and no imminent rain within 24 hours․ This ensures the product adheres properly to surfaces and maintains its residual activity․ Proper timing enhances pest control results and minimizes environmental impact․

4․2 Target Areas for Effective Use

Bifen I/T is most effective when applied to areas where pests are most active․ Indoors, target baseboards, windowsills, and cracks where insects hide․ Outdoors, focus on gardens, shrubs, and lawns, especially areas with high mosquito or aphid activity․ Ensure thorough coverage of leaf undersides and plant stems for optimal results․ Always follow label instructions for specific pest targeting․

Environmental Precautions

To protect the environment, avoid spraying near water sources or during rainy weather to prevent runoff․ Keep the product away from beneficial insects like bees and butterflies․

5․1 Avoiding Contamination of Water Sources

To prevent water contamination, avoid applying Bifen I/T near lakes, rivers, or ponds․ Spraying during heavy rain or strong winds increases runoff and drift risks․ Keep the product away from drains and gutters to ensure it doesn’t enter water systems․ Always follow label instructions for application rates and timing to minimize environmental impact․ Proper storage and disposal are also crucial to protect aquatic ecosystems․

5․2 Protecting Beneficial Insects

Bifen I/T can harm beneficial insects like bees and butterflies․ To minimize impact, avoid spraying during peak activity times and use barriers to protect pollinator habitats․ Apply the insecticide only to targeted areas and follow label instructions to reduce non-target effects․ Preserving beneficial insects supports ecosystem balance and long-term pest management․ Always prioritize integrated pest management practices to safeguard these vital species․

Storage and Disposal

Store Bifen I/T in a cool, dry place away from heat sources, children, and pets; Dispose of unused product and containers according to local regulations to prevent contamination․

6․1 Proper Storage Conditions

Bifen I/T should be stored in a cool, dry, well-ventilated area away from heat sources, moisture, and direct sunlight․ Keep the product in its original container, tightly sealed, and ensure the label remains intact․ Store it out of reach of children, pets, and food supplies; Ideal storage temperatures range between 40°F and 90°F (4°C and 32°C) to maintain product stability and effectiveness․

6․2 Safe Disposal Methods

Dispose of Bifen I/T and its container in accordance with local, state, and federal regulations․ Do not pour leftover product down drains or waterways, as it can contaminate water sources․ Contact local waste management officials for guidance on hazardous waste disposal․ Empty containers should be triple-rinsed and crushed before recycling or disposal, ensuring environmental protection and compliance with safety standards․

Troubleshooting Common Issues

Identify issues like inadequate pest control or mixing errors․ Ensure proper application rates and timing․ Check for contamination or improper storage affecting product efficacy․ Adjust methods as needed for optimal results and safety, following guidelines to minimize environmental impact and ensure effective pest management outcomes․ Regular monitoring and adherence to instructions are crucial for success․

7․1 Dealing with Inadequate Pest Control

If Bifen I/T isn’t providing adequate pest control, check the mixing ratio and application timing․ Ensure proper coverage of target areas․ Reapply as directed if needed, adjusting rates within labeled limits․ Verify pest identification to confirm susceptibility․ Environmental factors like weather may reduce efficacy, requiring additional treatments․ Always follow label instructions to optimize results and minimize resistance development in pest populations․

7․2 Addressing Mixing Errors

Incorrect mixing can reduce efficacy or pose safety risks․ Always use the recommended dilution rate and mix thoroughly․ Double-check measurements to avoid over- or under-dilution․ If mixed incorrectly, discard the solution and start over․ Ensure the spray tank is clean and rinse thoroughly after use․ Follow label instructions precisely to maintain safety and effectiveness of the insecticide application․

Frequently Asked Questions (FAQs)

  • Q: How many treatments are typically needed? Usually, 1-2 treatments are sufficient, depending on pest severity and environmental conditions․
  • Q: Can I reuse the mixed solution later? No, mix fresh solution for each application to ensure optimal effectiveness and safety․

8․1 General Usage Questions

  • Q: How often should Bifen I/T be applied? Apply every 21-30 days, adjusting based on pest activity and weather conditions for optimal results․
  • Q: Can Bifen I/T be mixed with other pesticides? It’s generally safe, but always test a small batch first to ensure compatibility and avoid unintended reactions․
  • Q: Does Bifen I/T harm beneficial insects? Yes, it can affect beneficial insects․ Apply targeted treatments to minimize impact on non-target species․
  • Q: Is Bifen I/T safe for pets? Keep pets away during application until the solution is dry․ It’s relatively safe once dried, but avoid direct exposure․

8․2 Safety and Environmental Concerns

  • Avoid contamination of water sources, as Bifen I/T can harm aquatic life․ Keep the product away from drains and water bodies․
  • Protect beneficial insects like bees by avoiding applications during peak pollination times․
  • Prevent spray drift to minimize impact on non-target areas and wildlife․
  • Dispose of unused product and empty containers according to local regulations to safeguard the environment․

Advantages of Using Bifen I/T

  • Effective against a wide range of pests, including mosquitoes, aphids, and leaf miners․
  • Long-lasting residual effect, reducing the need for frequent reapplications․
  • Synthetic pyrethroid formulation ensures durability and reliability in various environments․

9․1 Effectiveness Against Target Pests

Bifen I/T is highly effective against a broad spectrum of pests, including mosquitoes, aphids, and leaf miners․ Its synthetic pyrethroid formulation targets the nervous system of insects, leading to rapid paralysis and death․ This makes it particularly reliable for controlling infestations in both indoor and outdoor settings․ Its residual effect ensures prolonged protection, making it a versatile and efficient solution for pest management needs․

9․2 Cost Efficiency and Longevity

Bifen I/T offers exceptional cost efficiency due to its concentrated formulation, allowing precise mixing for targeted applications․ Its long residual effect ensures prolonged pest control, reducing the need for frequent treatments․ This longevity makes it a valuable investment for both residential and commercial use, providing effective pest management while minimizing costs over time․

Bifen I/T Insecticide is a reliable and effective solution for pest control, offering long-lasting results when mixed and applied correctly․ Always follow guidelines for optimal performance and safety․

10․1 Summary of Key Points

Bifen I/T Insecticide is a versatile and effective pest control solution․ Proper mixing, application, and safety precautions are essential for optimal results․ Always follow instructions to ensure efficacy and safety․ Regular use and correct dilution ratios help maintain long-lasting protection against target pests․ Adherence to environmental guidelines prevents contamination and protects beneficial insects, ensuring responsible pest management․

10․2 Final Recommendations for Use

For best results, always follow the mixing instructions precisely and apply during early morning or late evening to avoid direct sunlight․ Wear PPE and ensure proper storage in a cool, dry place․ Regular applications during peak pest seasons can maintain long-term effectiveness․ Adhere to environmental guidelines to protect beneficial insects and water sources․ Consult professionals for severe infestations to ensure safe and effective pest control․

sie study guide pdf

The SIE exam is an introductory assessment testing essential securities industry knowledge. Designed for new entrants, it covers products, market structure, and regulations, aiding career advancement with proper preparation using a detailed SIE study guide.

1.1 Overview of the Securities Industry Essentials Exam

The Securities Industry Essentials Exam (SIE) is an introductory assessment designed to evaluate foundational knowledge of the securities industry. It covers essential topics such as securities products, market structure, regulatory agencies, and industry practices. The exam is open to individuals aged 18 or older, making it accessible to newcomers in the field. A comprehensive SIE study guide is crucial for preparation, offering detailed insights into exam content and format. With 75 multiple-choice questions, the exam tests a candidate’s understanding of industry terminology, regulatory frameworks, and market operations; Successful completion of the SIE exam is a key step toward pursuing advanced securities licenses and career opportunities in the financial industry.

1.2 Importance of the SIE Study Guide

A comprehensive SIE study guide is essential for effectively preparing for the Securities Industry Essentials Exam. It provides a structured approach to understanding key concepts, such as securities products, market operations, and regulatory frameworks. The guide breaks down complex topics into digestible sections, ensuring candidates grasp foundational knowledge. Additionally, it includes practice questions and detailed explanations, helping learners identify and address gaps in their understanding. Regular use of the guide enables candidates to build confidence and familiarity with the exam format, ultimately improving their performance. A well-organized SIE study guide is a vital resource for anyone aiming to succeed in this critical exam.

Structure of the SIE Exam

The SIE exam consists of 75 multiple-choice questions, administered over 105 minutes. It evaluates knowledge of securities products, market operations, and regulatory frameworks, divided into clear sections.

2.1 Key Components of the Exam

The SIE exam comprises 75 multiple-choice questions, divided into key topics such as securities products, market structure, and regulatory frameworks. It assesses foundational knowledge of the securities industry, focusing on concepts like corporate actions, investment products, and regulatory agencies. The exam is timed at 105 minutes, requiring efficient time management. Understanding these components is crucial for effective preparation using a comprehensive SIE study guide. The exam’s structure ensures a broad understanding of industry essentials, making it a fundamental step for career advancement in the securities field.

2.2 Breakdown of Question Types and Formats

The SIE exam features 75 multiple-choice questions, each with four answer options. Questions are divided into knowledge-based and application-based categories. Knowledge-based questions test understanding of concepts like securities products and regulatory frameworks. Application-based questions present scenarios requiring analysis, such as calculating yields or interpreting market data. The exam also includes definition-based questions to assess familiarity with industry terminology. Time management is critical, as candidates must answer all questions within 105 minutes. A comprehensive study guide helps candidates master these question types and formats, ensuring they are well-prepared for the exam structure and content.

SIE Study Guide Sections

The SIE Study Guide is divided into key sections covering securities products, market structure, and regulatory agencies, providing a comprehensive framework for exam preparation.

3.1 Understanding Securities Products

Understanding securities products is a core component of the SIE exam. This section covers essential financial instruments, including stocks, bonds, derivatives, mutual funds, ETFs, and government securities. Students learn the characteristics, risks, and uses of each product, enabling them to grasp how they function in the market. The study guide provides detailed explanations and examples to simplify complex concepts, ensuring a strong foundation for exam success. Mastery of this section is crucial for understanding market dynamics and regulatory oversight, making it a key focus of the SIE study guide.

3.2 Market Structure and Function

The market structure and function section of the SIE exam explores how securities are traded, including exchanges, over-the-counter markets, and alternative trading systems. It delves into the roles of brokers, dealers, and clearing agencies, as well as the process of clearing and settling transactions. Students learn about order types, execution venues, and the impact of market structure on efficiency and fairness. The SIE study guide provides detailed explanations and examples to help candidates understand these complex systems. This section is critical for grasping how the securities industry operates and how regulatory frameworks maintain market integrity, ensuring a smooth trading process.

3.3 Regulatory Agencies and Their Roles

The SIE exam emphasizes understanding key regulatory agencies and their functions. The SEC, FINRA, and state regulators play crucial roles in maintaining market integrity. The SEC oversees public companies and enforces securities laws, while FINRA regulates brokers and ensures fair trading practices. State regulators focus on protecting local investors. The SIE study guide provides insights into how these agencies work together to uphold investor protection and market stability. Grasping their roles is essential for compliance and ethical practices in the securities industry, making this section vital for exam success and real-world application.

Effective Study Methods

Active learning techniques and time management are crucial for SIE success. Use spaced repetition, practice questions, and online resources like the SIE study guide PDF for structured preparation.

4.1 Time Management Strategies

Effective time management is key to SIE exam success. Allocate specific study periods for each topic, balancing theoretical learning with practice questions. Create a detailed schedule, ensuring consistent review and practice. Use the SIE study guide PDF to organize your study materials efficiently. Dedicate time blocks for each section, focusing on weak areas. Regularly assess progress to adjust your plan. Incorporate short breaks to maintain focus and avoid burnout. Prioritize topics based on their weight in the exam. By managing time wisely, you can cover all essential materials and enter the exam with confidence.

4.2 Active Learning Techniques

Active learning enhances retention and understanding of SIE exam material. Engage with the SIE study guide PDF by summarizing key points in your own words. Use flashcards to memorize important terms and concepts. Practice explaining topics aloud to test your comprehension. Incorporate group discussions or teach someone else to deepen your knowledge. Regularly review and apply concepts through practice questions. Interact with online resources and videos to supplement your learning. By actively participating in your study process, you can master the material more effectively and retain information for the exam. These techniques ensure you are not just reading but actively learning and applying what you study.

Practice Exams and Resources

Practice exams and resources are essential for SIE exam success. Utilize the SIE study guide PDF for structured learning and test your knowledge with included practice questions. Access online platforms offering mock exams to simulate real test conditions. Review detailed answer explanations to improve understanding. Leverage recommended resources for comprehensive preparation and confidence-building. Regular practice helps identify weak areas and refine time management skills, ensuring readiness for the actual exam.

5.1 Benefits of Taking Practice Exams

Taking practice exams is a crucial step in SIE exam preparation. It helps candidates familiarize themselves with the exam format, question types, and time constraints. Practice exams identify knowledge gaps, allowing focused study on weaker areas. They also enhance problem-solving skills and reduce exam-day anxiety. Utilizing the SIE study guide PDF, learners can access realistic practice questions and detailed explanations. Regular practice builds confidence and improves time management, ensuring a smoother experience during the actual test. By simulating exam conditions, practice exams provide valuable insights, enabling candidates to refine their strategies and achieve better results. Consistent practice is key to mastering the material effectively.

5.2 Recommended Online Resources

Several online resources complement the SIE study guide PDF, offering comprehensive exam preparation. Kaplan and FINRA provide detailed study materials, practice questions, and video tutorials. Online platforms like ExamGuide and SIEExam Prep offer interactive tools and mock exams. Additionally, forums and study groups on Reddit and LinkedIn connect candidates, fostering collaborative learning. These resources enhance understanding of securities products, market structures, and regulatory frameworks. Utilizing these tools alongside the SIE study guide ensures a well-rounded preparation strategy. They cater to diverse learning styles, making exam readiness more achievable. Leveraging these resources can significantly improve confidence and performance on the exam day.

Exam Day Tips

Manage exam anxiety with deep breathing exercises. Allocate time wisely, answering easy questions first. Arrive early and stay focused throughout the exam.

6.1 Managing Exam Anxiety

Managing exam anxiety is crucial for optimal performance. Start with deep breathing exercises to calm your nerves. Positive visualization can help reduce stress. Arrive early to familiarize yourself with the environment. Avoid cramming and ensure you’re well-rested. Stay hydrated and maintain a healthy diet. Break down the exam into manageable sections and tackle one question at a time. Remind yourself of your preparation and confidence in your knowledge. Use relaxation techniques, such as brief mindfulness practices, to maintain focus. A clear mind and composed demeanor will enhance your ability to think critically and answer questions effectively during the exam.

6.2 Time Management During the Exam

Effective time management is vital for success. Allocate about one minute per question to avoid rushing. Skip challenging questions initially and return to them later. Use the process of elimination to narrow down answer choices; Stay calm and methodical to avoid wasting time. Periodically check the timer to ensure you’re on track. Don’t spend too long on a single question—make an educated guess and move forward. Review your answers if time permits, but don’t second-guess yourself unnecessarily. Proper time management ensures you attempt all questions, maximizing your score and reducing stress during the exam.

Mastering the SIE exam requires thorough preparation. Utilize a comprehensive SIE study guide and practice exams to build a strong foundation and ensure success in your securities industry career.

7.1 Summing Up Key Points

The SIE exam is a foundational test for securities industry knowledge, covering products, market structure, and regulations. A detailed SIE study guide is essential for preparation, offering structured content and practice questions. Key areas include understanding securities products, market operations, and regulatory frameworks. Effective study methods, such as active learning and time management, are critical for success. Utilizing practice exams helps identify weaknesses and builds confidence. Combining thorough studying with strategic exam-day techniques ensures readiness. By following these steps, candidates can master the material and achieve a top score, solidifying their understanding of the securities industry.

7.2 Final Thoughts on SIE Exam Preparation

Mastering the SIE exam requires a combination of thorough preparation, strategic studying, and confidence. By leveraging a comprehensive SIE study guide, candidates can gain a deep understanding of industry concepts. Consistent practice with sample questions and mock exams is crucial for identifying gaps and refining knowledge. Staying calm and managing time effectively during the exam are equally important. The resources available, including study guides and online materials, provide ample support for success. With dedication and the right approach, candidates can confidently tackle the SIE exam, setting a strong foundation for their career in the securities industry.

twas the night before christmas poem pdf

The classic poem‚ widely available as a free PDF‚ captures the essence of Christmas Eve with its vivid imagery and timeless charm‚ delighting readers of all ages.

1.1 Overview of the Poem

“Twas the Night Before Christmas‚” also known as “A Visit from St. Nicholas‚” is a beloved Christmas poem that captures the magic of Christmas Eve. The poem‚ written in rhyming verse‚ describes a peaceful household on the night before Christmas‚ interrupted by the arrival of Santa Claus and his reindeer. Its vivid imagery‚ playful rhythm‚ and timeless themes have made it a holiday classic‚ enjoyed by readers of all ages. The poem’s enduring popularity has led to numerous adaptations‚ including illustrated versions and free PDF downloads.

1.2 Historical Significance and Popularity

First published in 1823‚ “Twas the Night Before Christmas” is one of the most enduring Christmas poems‚ shaping holiday traditions and culture. Attributed to Clement Clarke Moore‚ it popularized the modern image of Santa Claus and his reindeer. Its rhythmic verse and whimsical descriptions have made it a beloved classic‚ widely shared in print‚ online‚ and as free PDF downloads. The poem’s historical significance lies in its role in defining Christmas folklore‚ making it a timeless piece of holiday literature cherished globally.

History and Authorship of the Poem

Written by Clement Clarke Moore in 1823‚ the poem‚ originally titled A Visit from St. Nicholas‚ has become a cornerstone of Christmas literature worldwide.

2.1 Clement Clarke Moore and the Poem’s Origins

Clement Clarke Moore‚ an American poet and scholar‚ crafted the poem in 1823 for his children. It was first published anonymously in the Troy‚ New York Sentinel and later attributed to Moore. His vivid descriptions of Santa Claus and Christmas Eve traditions laid the foundation for modern holiday imagery‚ making the poem a beloved classic. Available as a PDF‚ it continues to charm readers with its original charm and timeless appeal.

2.2 Publication and Evolution Over Time

First published anonymously in 1823 in the Troy‚ New York Sentinel‚ the poem gained popularity and was later attributed to Clement Clarke Moore. Over time‚ it has undergone various adaptations‚ with illustrations and multimedia enhancements. The poem’s original version is now widely available as a free PDF‚ preserving its classic charm while introducing it to new generations. Its evolution reflects its enduring appeal‚ making it a staple of Christmas literature and culture.

Themes and Imagery in the Poem

The poem vividly portrays a serene Christmas Eve‚ filled with magic and wonder‚ focusing on themes of joy‚ family‚ and the mystical arrival of Santa Claus.

3.1 The Magic of Christmas Eve

The poem masterfully captures the enchanted atmosphere of Christmas Eve‚ describing a house where not a creature stirs‚ except for the anticipation of Santa’s visit. The imagery of stockings hung by the chimney and the silent night amplifies the magical setting. The arrival of Santa‚ with his sleigh and reindeer‚ adds a mystical dimension‚ creating a sense of wonder. This portrayal of Christmas Eve’s charm has become iconic‚ resonating with readers and making the poem a cherished holiday tradition‚ especially in its easily accessible PDF format.

3.2 The Iconic Image of Santa Claus

The poem vividly portrays Santa Claus as a jolly‚ round-bellied figure in a miniature sleigh‚ guided by reindeer like Dasher and Dancer. His cheerful demeanor and generous spirit‚ captured in lines like “Happy Christmas to all‚ and to all a good-night‚” have shaped the modern image of Santa. The description of his arrival and departure‚ with his sleigh and team‚ has become synonymous with Christmas folklore. This imagery‚ now widely recognized‚ continues to inspire holiday traditions and is easily accessible in PDF versions of the poem.

The Poem’s Influence on Christmas Culture

The poem’s vivid imagery and themes have shaped Christmas traditions‚ inspiring holiday literature and art. Its portrayal of Santa Claus and festive scenes remains deeply ingrained in culture.

4.1 Shaping the Modern Image of Santa Claus

The poem fundamentally transformed the perception of Santa Claus‚ introducing the jolly‚ gift-giving figure with a round belly and hearty laugh. Moore’s vivid description replaced earlier‚ more varied depictions‚ creating a unified image embraced globally. The PDF version of the poem‚ widely available‚ spreads this iconic characterization. Illustrated editions further solidify Santa’s recognizable appearance. This imagery has influenced art‚ media‚ and advertising‚ making it central to Christmas culture and ensuring Santa’s enduring popularity as a symbol of joy and generosity.

4.2 Impact on Holiday Traditions and Literature

The poem has profoundly influenced Christmas traditions‚ embedding imagery of Santa‚ reindeer‚ and stocking-stuffing into cultural consciousness. Its rhythmic verse and festive themes have inspired countless adaptations in literature‚ film‚ and art. The availability of the poem in PDF format ensures its accessibility‚ allowing it to continue shaping holiday practices and literary works. Its enduring popularity reflects its ability to evoke a sense of wonder and joy‚ making it a cornerstone of Christmas celebrations worldwide for nearly two centuries.

“Twas the Night Before Christmas” in PDF Format

The poem is widely available as a free PDF download‚ offering a convenient way to enjoy its timeless charm. Illustrated versions add festive visual appeal‚ making it perfect for sharing during the holiday season. This format ensures the poem remains accessible to readers of all ages‚ preserving its legacy for future generations to cherish and enjoy.

5.1 Availability of the Poem as a Free PDF

The poem “Twas the Night Before Christmas” is widely available as a free PDF download‚ making it easily accessible to readers worldwide. Various websites offer the poem in digital format‚ often accompanied by illustrations or annotations. Platforms like literary archives‚ educational sites‚ and holiday-themed pages provide quick access to the PDF. This availability ensures that the poem remains a cherished resource for holiday celebrations and educational purposes‚ allowing readers to enjoy its timeless charm at no cost.

5.2 Illustrated Versions and Designs

The poem is often enhanced with illustrated versions that bring its magical scenes to life. Artists like Jessie Willcox Smith have created iconic visuals‚ making the PDFs a treasure for readers. These designs vary from classic to modern‚ offering diverse interpretations of Santa Claus and Christmas Eve. Illustrated PDFs are widely available on platforms like Amazon and Etsy‚ adding a visual charm that complements the poem’s enchanting narrative. This blend of art and text enhances the festive experience‚ making the PDF a delightful holiday keepsake.

Educational and Creative Uses of the PDF

The PDF version of the poem is ideal for classroom activities‚ such as reading exercises or lesson plans‚ fostering creativity and holiday spirit through engaging tasks and crafts.

6.1 Classroom Activities and Lesson Plans

Teachers can utilize the PDF version of the poem for engaging classroom activities‚ such as reading aloud‚ comprehension exercises‚ and creative writing prompts. Students can analyze the vivid imagery and rhyme scheme‚ fostering literary skills. The poem also inspires art projects‚ like illustrating scenes or designing holiday cards. Additionally‚ educators can incorporate the PDF into lesson plans focused on history‚ cultural traditions‚ and the evolution of Christmas celebrations. These activities make learning fun and meaningful‚ connecting students to the poem’s timeless charm and holiday spirit.

6;2 DIY Crafts and Holiday Decorations

The PDF version of the poem offers a unique canvas for DIY crafts and holiday decorations. Families can print the text on festive paper and frame it as a wall art piece. Additionally‚ the poem’s verses can be used to create handmade cards‚ gift tags‚ or scrolls. Illustrated versions inspire crafters to design themed decorations‚ such as paper cutouts of Santa Claus or reindeer. These creative projects bring the poem to life‚ adding a personal touch to holiday decor and making celebrations more meaningful and joyful.

Modern Adaptations and Interpretations

The poem’s timeless appeal is evident in its modern adaptations‚ including digital versions‚ animated films‚ and audio narratives. These interpretations breathe fresh life into the classic tale‚ blending traditional charm with contemporary creativity‚ ensuring its relevance for new generations while preserving its original magic and allure.

7.1 Digital Versions and Multimedia Presentations

Digital versions of “Twas the Night Before Christmas” have revolutionized how the poem is experienced. Available as free PDF downloads‚ the poem is easily accessible for reading on devices. Multimedia presentations‚ including animated films and audiobooks‚ bring the story to life with visuals and sound effects. Interactive e-books and apps offer immersive experiences‚ allowing readers to engage with the poem in new ways. These adaptations ensure the classic tale remains relevant in the digital age‚ captivating both children and adults with its enduring charm.

7.2 Parodies and Contemporary Remixes

The timeless appeal of “Twas the Night Before Christmas” has inspired countless parodies and modern reinterpretations. From humorous twists like “Twas the Night Before Christmas‚ Keto Edition” to pop culture mashups‚ these adaptations breathe fresh life into the classic poem. Authors and creators often use the poem’s rhythmic structure to address contemporary themes‚ such as technology‚ politics‚ or social trends. These parodies‚ available in PDF and digital formats‚ showcase the versatility of Moore’s original work‚ making it relatable to new generations while preserving its festive spirit.

The timeless charm of “Twas the Night Before Christmas” endures‚ with its PDF versions ensuring its legacy lives on‚ inspiring joy and festive spirit across generations worldwide.

8.1 The Timeless Appeal of the Poem

The poem’s enduring appeal lies in its vivid imagery and heartfelt portrayal of Christmas magic. Its rhythmic verse and joyful tone evoke nostalgia and wonder‚ making it a cherished holiday tradition. The story of Santa Claus and his reindeer has become synonymous with Christmas spirit‚ transcending generations. Available as a PDF‚ the poem remains accessible‚ ensuring its timeless message of love and joy continues to inspire readers worldwide‚ solidifying its place as a holiday classic.

8.2 Its Enduring Legacy in Christmas Celebrations

The poem’s enduring legacy is evident in its profound influence on Christmas traditions and culture. It shaped the modern image of Santa Claus and inspired countless adaptations in literature‚ art‚ and media. The availability of the poem as a PDF ensures its accessibility for holiday activities‚ from classroom readings to family gatherings. Its themes of joy‚ generosity‚ and magic continue to resonate‚ making it a cornerstone of Christmas celebrations worldwide‚ ensuring its relevance for generations to come.

you’d be home now pdf

Title and Author

You’d Be Home Now‚ a New York Times bestseller‚ is a powerful young adult novel written by acclaimed author Kathleen Glasgow․

1․1 Title: You’d Be Home Now

You’d Be Home Now is a poignant and evocative title that reflects the emotional core of the story‚ highlighting themes of identity‚ family‚ and redemption․ The title underscores the longing for a sense of belonging and the challenges of finding one’s place in a world shaped by addiction and loss․

1․2 Author: Kathleen Glasgow

Kathleen Glasgow is a New York Times bestselling author known for her raw‚ emotionally charged storytelling․ Her works‚ including Girl in Pieces and How to Make Friends with the Dark‚ explore themes of identity‚ family‚ and resilience․ Glasgow’s nuanced writing style has earned her critical acclaim and a dedicated readership‚ solidifying her place in young adult literature․

Book Overview

You’d Be Home Now is a young adult fiction novel published by Delacorte Press on September 28‚ 2021․ It explores the opioid crisis and family dynamics‚ earning critical acclaim as a New York Times bestseller․

2․1 Genre: Young Adult Fiction

You’d Be Home Now falls under the Young Adult Fiction genre‚ focusing on themes of addiction‚ family dynamics‚ and self-discovery․ Glasgow’s vivid storytelling captures the complexities of adolescence‚ making it relatable for teen readers while addressing mature issues with emotional depth and sensitivity‚ perfectly aligning with the YA genre’s focus on coming-of-age narratives and contemporary societal challenges․

2․2 Publication Date: September 28‚ 2021

You’d Be Home Now was officially released on September 28‚ 2021‚ by Delacorte Press․ The novel quickly gained attention for its raw portrayal of addiction and family dynamics‚ earning it a spot as a New York Times bestseller and receiving critical acclaim from Kirkus‚ Booklist‚ and Vanity Fair for its honest and heartfelt storytelling․

2․3 Publisher: Delacorte Press

Delacorte Press‚ an imprint of Penguin Random House‚ published You’d Be Home Now․ Known for its commitment to quality literature‚ Delacorte Press has a long history of producing impactful young adult fiction․ The book’s success as a New York Times bestseller underscores the publisher’s dedication to amplifying stories that resonate deeply with readers‚ making it a trusted name in the literary world․

Plot Summary

You’d Be Home Now follows Emmy‚ a teenager grappling with her brother Joey’s addiction and a tragic car accident․ As she navigates her altered reality‚ Emmy confronts identity‚ family dynamics‚ and the opioid crisis in her town‚ seeking self-discovery amidst the fallout․

3․1 Main Character: Emmy

Emmy is the protagonist‚ a teenager known as the “good one” in her family․ She navigates her brother’s addiction‚ her town’s opioid crisis‚ and her own identity․ Struggling with expectations‚ Emmy seeks self-discovery and truth about herself and those around her‚ beyond the labels imposed by her community and family dynamics․

3․2 Central Conflict: Brother’s Addiction and Family Dynamics

The central conflict revolves around Emmy’s brother Joey’s opioid addiction‚ which disrupts their family and small town․ The story explores the emotional fallout‚ strained relationships‚ and societal stigma․ A car accident involving Joey and Emmy reveals the severity of his addiction‚ forcing the family to confront their struggles and the broader opioid crisis impacting their community․

3․3 Setting: A Town Ravaged by the Opioid Crisis

The story unfolds in Mill Haven‚ a small town deeply affected by the opioid crisis․ The community is marked by addiction‚ tragedy‚ and societal stigma․ The town’s struggles mirror the broader epidemic‚ creating a haunting backdrop for Emmy’s journey of self-discovery and her family’s fight to heal amidst the devastating impact of drugs on their lives and relationships․

Themes and Issues

The Opioid Crisis and Its Impact: The novel explores the devastating effects of addiction on individuals‚ families‚ and communities‚ shedding light on the broader societal implications of drug abuse․

4․1 The Opioid Crisis and Its Impact

The Opioid Crisis and Its Impact is central to the story‚ portraying how addiction ravages a small town and its people․ The novel highlights the ripple effects of drug abuse on families‚ friendships‚ and community dynamics‚ offering a poignant reflection of real-world struggles and the resilience needed to overcome them․

4․2 Family Relationships and Addiction

Family Relationships and Addiction are deeply explored‚ illustrating how addiction fractures bonds and reshapes roles within families․ The novel portrays Emmy’s struggle to reconcile her brother’s addiction with her own identity‚ emphasizing the emotional toll and the complex dynamics of love‚ guilt‚ and responsibility that arise in such circumstances․

4․3 Identity and Self-Discovery

Identity and Self-Discovery are central themes‚ as Emmy navigates her sense of self amidst her brother’s addiction and societal expectations․ The novel explores her journey of breaking free from predefined roles‚ embracing her true self‚ and understanding the complexity of human identity in a world that often seeks to label and confine individuals․

Reviews and Reception

You’d Be Home Now has received critical acclaim for its raw‚ deeply personal portrayal of addiction and family dynamics․ Kirkus praises its honesty‚ while Vanity Fair calls it impossibly moving․ It’s a raw yet vital read․

5․1 Critical Acclaim: Kirkus‚ Booklist‚ and School Library Journal

Kirkus calls it “necessary‚ important‚ honest‚ loving‚ and true‚” while Booklist praises its nuanced exploration of family dynamics․ School Library Journal highlights its compassionate portrayal of addiction’s impact‚ making it a standout in young adult literature for its unflinching yet heartfelt storytelling․

5․2 Media Coverage: Vanity Fair and Shondaland

Vanity Fair describes You’d Be Home Now as “impossibly moving and suffused with light‚” while Shondaland praises it as a “fantastic find․” Both outlets highlight the novel’s intimate portrayal of addiction’s ripple effects‚ earning widespread media acclaim for its emotional depth and authenticity․

5․3 Reader Ratings: 4;7/5 on Indigo Chapters

Readers on Indigo Chapters have enthusiastically rated You’d Be Home Now with an average of 4․7 out of 5 stars․ Over 118 reviews highlight the novel’s emotional resonance‚ with many praising its raw honesty and profound exploration of family dynamics and addiction‚ making it a standout choice for contemporary young adult fiction․

Author Background

Kathleen Glasgow is a New York Times and internationally bestselling author known for her raw‚ personal storytelling․ She resides in Tucson‚ Arizona‚ and actively engages with readers through social media platforms like Twitter and Instagram․

6․1 Kathleen Glasgow’s Other Works: Girl in Pieces‚ How to Make Friends with the Dark

Kathleen Glasgow is renowned for her impactful novels‚ including Girl in Pieces and How to Make Friends with the Dark․ These works explore themes of resilience‚ identity‚ and family dynamics‚ showcasing her ability to craft deeply emotional and relatable stories that resonate with readers of all ages․

6․2 Writing Style: Raw‚ Personal‚ and Nuanced

Kathleen Glasgow’s writing style is raw‚ deeply personal‚ and nuanced‚ capturing the emotional depth of her characters with unflinching honesty․ Her ability to weave compassionate storytelling with stark realism has earned her critical acclaim‚ making her a New York Times bestseller and a voice for vulnerable voices in young adult literature․

6․3 Awards and Recognition: New York Times Bestseller

You’d Be Home Now achieved New York Times Bestseller status‚ solidifying its impact as a powerful young adult novel․ The book’s raw portrayal of addiction and family dynamics resonated deeply with readers‚ earning it critical acclaim and a place among the most recognized works in contemporary young adult literature․

Book Series and Collections

This collection includes You’d Be Home Now‚ Girl in Pieces‚ How to Make Friends with the Dark‚ and The Glass Girl‚ showcasing Glasgow’s profound storytelling․

7․2 The Agathas Mystery Series (Co-authored with Liz Lawson)

Glasgow and Liz Lawson co-authored The Agathas and its sequel‚ The Night in Question‚ blending mystery and teen drama in a compelling series․

7․1 Kathleen Glasgow 4 Book Set Collection

The Kathleen Glasgow 4 Book Set Collection includes You’d Be Home Now‚ Girl in Pieces‚ How to Make Friends with the Dark‚ and The Glass Girl․ This collection offers readers a poignant journey through themes of family‚ addiction‚ and self-discovery‚ showcasing Glasgow’s raw and nuanced storytelling․

7․2 The Agathas Mystery Series (Co-authored with Liz Lawson)

Kathleen Glasgow co-authored The Agathas and its sequel‚ The Night in Question‚ with Liz Lawson․ This bestselling mystery series blends suspenseful plots with deep character exploration‚ offering a fresh take on the teen mystery genre while maintaining Glasgow’s signature nuanced storytelling․

You’d Be Home Now sheds light on the opioid crisis in small-town America‚ highlighting its devastating impact on families and communities‚ making it a culturally resonant and timely narrative․

8․1 Portrayal of Addiction in Small-Town America

You’d Be Home Now delivers a raw‚ unflinching portrayal of addiction in small-town America‚ exploring the opioid crisis’s grip on families and communities․ Through Emmy’s story‚ Kathleen Glasgow captures the collective pain and stigma surrounding addiction‚ offering a poignant reflection of a nation’s struggle․ The novel humanizes the crisis‚ emphasizing its far-reaching impact on individuals and society alike․

Social and Cultural Relevance

8․2 Impact of Drug Abuse on Families and Communities

You’d Be Home Now explores how drug abuse rips apart families and shatters communities‚ highlighting the emotional and financial toll of addiction․ The novel portrays the stigma and isolation that often accompany substance abuse‚ while also emphasizing the resilience and support needed for recovery․ It underscores the ripple effects of addiction‚ revealing how it fractures relationships and destabilizes entire towns․

Contemporary Issues

You’d Be Home Now delves into teenage relationships‚ exploring themes of peer pressure‚ identity struggles‚ and the challenges of navigating complex social dynamics during adolescence․

9․1 Teenage Relationships and Challenges

You’d Be Home Now explores the complexities of teenage relationships‚ highlighting struggles with identity‚ peer pressure‚ and loyalty․ Emmy navigates friendships and romantic interests while grappling with her brother’s addiction‚ illustrating how personal and family challenges shape adolescent interactions and self-discovery․

9․2 Mental Health and Recovery

You’d Be Home Now delves into the raw and nuanced portrayal of mental health‚ emphasizing resilience and recovery․ Emmy’s journey reflects the emotional toll of addiction on individuals and families‚ highlighting the struggle for healing and self-discovery․ The novel underscores the importance of love and support in navigating the complexities of mental health and recovery․

Availability and Formats

You’d Be Home Now is available in hardcover‚ paperback‚ and audiobook formats․ Purchase options include Penguin Random House‚ Barnes & Noble‚ and Indigo Chapters․

10․1 Hardcover‚ Paperback‚ and Audiobook Options

You’d Be Home Now is available in multiple formats․ Hardcover editions are priced at $20․99‚ while paperback versions cost $11․99․ Audiobook options are accessible through Apple‚ Audible‚ and other platforms‚ offering a convenient listening experience for readers who prefer audio formats․ These options ensure accessibility for diverse reading preferences‚ making the story widely reachable to audiences․

10․2 Purchase Links: Penguin Random House‚ Barnes & Noble‚ Indigo

Readers can purchase You’d Be Home Now through various online retailers․ Penguin Random House‚ Barnes & Noble‚ and Indigo Chapters offer convenient links to buy the book in hardcover‚ paperback‚ or audiobook formats‚ ensuring easy access for fans of Kathleen Glasgow’s works․

You’d Be Home Now is a poignant exploration of addiction‚ family‚ and self-discovery․ Its raw storytelling resonates deeply‚ offering a powerful reflection on resilience and love amidst crisis․

11․1 Final Thoughts on the Book’s Message

You’d Be Home Now delivers a profound message about the opioid crisis‚ emphasizing the importance of understanding and empathy․ It highlights the ripple effects of addiction on families and communities‚ urging readers to embrace love and authenticity․ The novel’s raw honesty and nuanced portrayal of human struggles make it a vital and unforgettable read․

11․2 Recommendations for Readers

Readers seeking a poignant‚ character-driven story about family‚ addiction‚ and self-discovery will find You’d Be Home Now compelling․ Its raw‚ personal narrative resonates deeply‚ making it ideal for fans of contemporary YA fiction addressing real-world issues․ The book’s vivid portrayal of small-town life and the opioid crisis adds depth‚ offering a thought-provoking experience․

wheelchair measuring guide

Welcome to the Wheelchair Measurement Guide, your essential resource for ensuring proper fit and comfort. Proper measurements are crucial for optimal mobility and safety. This guide provides detailed steps to measure key dimensions, including seat width, depth, and back height. Follow these steps to tailor the wheelchair to individual needs for maximum independence and comfort.

1.1 Importance of Proper Measurements

Proper measurements are crucial for ensuring the wheelchair fits the user accurately, promoting comfort, safety, and mobility. A well-fitting chair prevents discomfort, pressure sores, and potential health issues arising from prolonged poor posture. It enables easy movement and propulsion, reducing fatigue and strain. Accurate measurements also ensure the chair supports the user’s body correctly, maintaining proper posture and preventing muscle imbalances. Additionally, considering factors like clothing thickness and cushioning ensures year-round comfort. Proper fit is foundational for optimal mobility and long-term health.

1.2 Brief Overview of the Guide

This guide provides a comprehensive approach to measuring for a wheelchair, ensuring a proper fit for optimal comfort and functionality. It covers essential measurements such as seat width, depth, and back height, as well as leg length and footrest positioning. The guide emphasizes the importance of accurate measurements to prevent discomfort, health complications, and mobility issues. By following the steps outlined, users can ensure their wheelchair is tailored to their specific needs, promoting independence and confidence.

  • Key measurements include seat width, depth, and back height.
  • Leg length and footrest positioning are also critical for proper fit.
  • Accurate measurements prevent discomfort and health issues.
  • The guide ensures the wheelchair is tailored to individual needs.

With clear, step-by-step instructions, this guide helps users achieve the perfect fit for their wheelchair, enhancing mobility and overall well-being.

Proper wheelchair measurements are vital for comfort, safety, and mobility. Incorrect measurements can lead to discomfort, health issues, and limited independence. A well-fitted wheelchair ensures optimal support, ease of use, and alignment with individual needs. This guide provides clear steps to measure accurately, ensuring the wheelchair enhances the user’s lifestyle and independence;

1.1 Importance

Proper wheelchair measurements are essential for ensuring comfort, safety, and optimal functionality. A well-fitted wheelchair prevents discomfort, pressure sores, and long-term health issues. Accurate measurements also enhance mobility, allowing users to navigate with ease and independence; When a wheelchair is tailored to an individual’s body, it supports proper posture, reducing strain on muscles and joints. Additionally, correct sizing ensures the wheelchair is stable and safe to use, minimizing the risk of accidents or injuries.

Incorrect measurements can lead to a poor fit, which may result in limited mobility and reduced independence. For instance, a seat that is too narrow or too wide can cause discomfort and make it difficult to maneuver. Similarly, improper seat depth or height can affect posture and balance, leading to fatigue or strain. Proper measurements also ensure that the wheelchair can accommodate necessary accessories, such as cushions or back supports, which are critical for long-term comfort and health.

Measuring correctly is especially important for individuals with specific medical needs, such as those with spinal injuries or chronic pain. A wheelchair that fits properly can help prevent complications and improve overall quality of life. By taking the time to measure accurately, users can ensure their wheelchair is both functional and supportive, meeting their unique needs for years to come.

1.2 Brief Overview

This guide provides a comprehensive approach to measuring for a wheelchair, ensuring the best fit for comfort, safety, and functionality. It outlines the key dimensions to consider, such as seat width, seat depth, back height, and knee-to-heel measurement. Proper measurements are taken with the user in a seated position, using firm tools like metal measuring tapes and calipers to ensure accuracy.

The process begins with measuring the widest distance from hip to hip for seat width, adding 1-2 inches for comfort. Seat depth is determined by measuring from the back of the hips to the back of the knees, ensuring adequate support without restricting movement. Back height is measured from the seat surface to the top of the back or headrest, depending on the user’s needs.

Knee-to-heel measurement is critical for leg positioning, ensuring the footrests are set correctly to avoid pressure on the legs. Additional considerations include the thickness of cushions, which may require adjustments to the overall dimensions. The guide also emphasizes the importance of accounting for soft tissue and clothing, such as adding 2 cm for winter wear.

By following this guide, users can ensure their wheelchair is tailored to their specific needs, promoting independence, comfort, and safety. The measurements are straightforward and can be completed with basic tools, making the process accessible to everyone. This overview sets the foundation for understanding the essential steps in achieving the perfect fit for a wheelchair.

Essential Measurements

Measure seat width by determining the widest hip-to-hip distance while seated, adding 1-2 inches for comfort. Seat depth is measured from the back of the hips to the back of the knees. Use a firm tool like a metal tape measure for accuracy. Ensure all measurements are taken straight across the body without compressing soft tissue. Consider cushion thickness and adjust accordingly. For knee-to-heel, measure from the shoe heel to the knee hollow and subtract cushion thickness. Use a form to track measurements. Add 2 cm for winter clothing if needed. Ensure consistency and consider lifestyle factors for the best fit.

2.1 Seat Width

Seat width is one of the most critical measurements for a proper wheelchair fit. It ensures comfort, prevents pressure sores, and allows for adequate movement. To measure seat width accurately, have the individual sit upright in a chair with their feet flat on the floor or a footrest. Measure the widest distance between the hips, ensuring the tape measure is straight and parallel to the floor. Add 1-2 inches to this measurement to allow for space and comfort. If the person uses a cushion, include its thickness in the measurement to avoid compression.

Use a firm measuring tool, such as a metal tape measure, for accuracy. If the individual has a body shape that makes it difficult to measure directly, consider using calipers or a large, sturdy object to gauge the width. Always measure across the widest point of the hips, as this will determine the seat width of the wheelchair. For example, if the hip-to-hip measurement is 18 inches, the seat width should be around 19-20 inches to ensure proper fit and mobility.

It’s important to note that seat width should also account for any clothing or cushions that may affect the measurement. For instance, adding 2 cm to the measurement can accommodate winter clothing. Double-check the measurement by comparing it to the wheelchair’s seat frame, ensuring it aligns with the user’s needs. Accurate seat width ensures optimal comfort and prevents potential discomfort or health issues related to improper fit.

Remember, consistency is key. Use a measurement form to document the seat width and other dimensions for clarity. This step ensures the wheelchair is tailored to the individual’s specific requirements, promoting independence and overall well-being.

nikon d5000 instruction manual

The Nikon D5000 is a 12.3-megapixel DSLR camera featuring a CMOS sensor and EXPEED image processor, delivering high-quality images with low noise. It offers a vari-angle LCD screen for flexible shooting and HD video recording capabilities, making it an excellent choice for photography enthusiasts seeking versatility and performance.

1.1 Overview of the Nikon D5000

The Nikon D5000 is a 12.3-megapixel DSLR camera featuring a CMOS sensor and EXPEED image processor, offering high-quality images with low noise. It includes a vari-angle 2.7-inch LCD screen, HD video recording, and an ISO range of 200-3200 (expandable to 100-6400). Designed for both beginners and advanced users, it combines intuitive controls with advanced features, making it a versatile tool for photography enthusiasts.

1.2 Key Features of the Nikon D5000

The Nikon D5000 features a 12.3-megapixel CMOS sensor, EXPEED image processor, and a vari-angle 2.7-inch LCD screen with 230,000 pixels. It offers an ISO range of 200-3200 (expandable to 100-6400), 11 AF points, and HD video recording at 1280×720 pixels (24 fps). Additional features include scene modes, picture controls, and a self-timer, making it versatile for both stills and video capture.

Getting Started with Your Nikon D5000

Begin by unboxing, charging the battery, and inserting a memory card. Mount the lens and familiarize yourself with basic camera controls for a smooth setup experience.

2.1 Unboxing and Initial Setup

Unbox your Nikon D5000 carefully, ensuring all accessories are included. Charge the battery using the provided charger until the indicator turns green. Insert a compatible memory card into the card slot. Gently mount the lens, ensuring it clicks securely. Familiarize yourself with the camera’s basic controls, such as the mode dial, shutter button, and command dials. Handle the camera with care to avoid damage.

2.2 Charging the Battery and Inserting the Memory Card

Charge the Nikon D5000’s battery using the provided MH-24 charger until the indicator light turns green. Insert a compatible SD or SDHC memory card into the camera’s card slot, located on the right side. Ensure the card is properly seated and formatted for optimal performance. Always use a fully charged battery and a formatted card for reliable operation during photo sessions.

2.3 Mounting the Lens and Basic Camera Handling

To mount a lens on the Nikon D5000, align the lens mount index with the camera’s white mark and turn counterclockwise until it clicks. Ensure the lens is securely attached. Hold the camera firmly with one hand on the grip and the other supporting the lens. For stability, keep your arms close to your body and use the viewfinder for accurate framing. Always handle the camera with care to prevent damage.

Camera Modes and Settings

The Nikon D5000 offers various shooting modes, including Auto, P, S, A, and M, allowing users to adjust settings like ISO, white balance, and autofocus for optimal results.

3;1 Understanding Auto, Semi-Auto, and Manual Modes

The Nikon D5000 offers multiple shooting modes to suit different photography needs. Auto Mode is ideal for beginners, automatically adjusting settings for effortless shooting. Semi-Auto Modes, such as Program, Shutter Priority, and Aperture Priority, allow users to control specific settings while the camera manages others. Manual Mode provides full control over aperture, shutter speed, and ISO for advanced users to achieve precise results in various lighting conditions.

3.2 Configuring ISO, White Balance, and Focus Settings

The Nikon D5000 allows precise control over ISO, white balance, and focus settings. ISO sensitivity ranges from 200 to 3200, expandable to 100 and 6400, minimizing noise in low-light conditions. White balance options include Auto, Cloudy, Flash, Fluorescent, Incandescent, Manual, Shade, and Sunny for accurate color reproduction. Autofocus modes like AF-S, AF-C, and AF-A offer flexibility for static or moving subjects, while manual focus provides precise control using the lens focus ring.

Autofocus and Metering

The Nikon D5000 features an advanced 11-point autofocus system for precise subject tracking and TTL metering for accurate exposure control, ensuring sharp images and balanced lighting.

4.1 Autofocus Modes: AF-S, AF-C, and AF-A

The Nikon D5000 offers three autofocus modes: AF-S (single-servo) for stationary subjects, AF-C (continuous-servo) for tracking moving subjects, and AF-A (auto-servo) which automatically switches between AF-S and AF-C based on subject movement. Each mode ensures precise focus control, allowing photographers to capture sharp images in various shooting conditions with ease and versatility.

4.2 Manual Focus and Focus Lock

Manual focus on the Nikon D5000 allows precise control by adjusting the lens focus ring, ideal for creative or tricky focusing situations. Focus lock enables capturing sharp images by locking focus on a subject, then recomposing the shot without refocusing. This feature is accessed via the AE-L/AF-L button, ensuring your subject remains in focus even when recomposing.

Image and Video Quality Settings

The Nikon D5000 delivers high-quality images with adjustable resolution and compression settings, ensuring optimal results. It supports HD video recording, allowing users to capture sharp, detailed footage effortlessly.

5.1 Adjusting Image Resolution and Quality

The Nikon D5000 allows users to adjust image resolution and quality settings to suit their needs. Resolution can be set to 4288×2848, 3216×2136, or 2144×1424 pixels. Image quality options include Fine, Normal, and Basic compression levels. Users can also select file formats such as NEF (RAW) or JPEG. Lower compression reduces file size but may compromise detail. Experiment with settings to balance quality and storage efficiency.

5.2 Video Recording: Resolution, Frame Rate, and Formats

The Nikon D5000 supports video recording at a maximum resolution of 1280 x 720 pixels (HD) with a frame rate of 24 frames per second. Videos are recorded in the Motion JPEG format, offering high-quality footage. The camera allows continuous recording up to 5 minutes in high-quality mode or 20 minutes in normal mode. This feature is ideal for capturing dynamic scenes with clarity and detail.

Using the Vari-Angle LCD Screen

The Nikon D5000 features a 2.7-inch vari-angle LCD screen, allowing flexible shooting from various angles. Its 230,000-dot resolution ensures sharp previews and easy menu navigation.

6.1 Navigating the Menu System

Access the menu by pressing the Menu button. Use the multi-selector to navigate through options and the OK button to select. The D5000’s menu is organized into Shooting, Custom Settings, and Playback menus. Highlight desired options using the multi-selector and adjust settings with the command dial. Press the Menu button to exit or use the Zoom Out/Wide button for quick menu access.

6.2 Live View and Movie Mode

Activate Live View via the LV button for real-time preview on the vari-angle LCD. Enter Movie Mode by selecting the Movie icon in Live View. Adjust settings like resolution (up to 1280×720) and frame rate before recording. Press the Shutter button to start/stop recording. Use the multi-selector to focus and adjust exposure with the command dial for optimal video capture.

Advanced Shooting Techniques

Explore advanced techniques like Continuous Shooting for capturing dynamic sequences and Self-Timer for delay-triggered shots. Utilize Remote Shooting with the ML-L3 remote for vibration-free photography.

7.1 Continuous Shooting and Burst Mode

Activate Continuous Shooting by selecting the burst mode via the control button near the shutter release. The Nikon D5000 captures up to 4 frames per second, ideal for freezing fast-moving subjects; The buffer allows up to 12 RAW or 67 JPEG images before needing to write to the memory card. Use a fast memory card for optimal performance and uninterrupted shooting sessions.

7.2 Using the Self-Timer and Remote Shooting

The Nikon D5000’s self-timer allows delays of 2, 5, 10, or 20 seconds, reducing camera shake for sharper images. Enable it via the shooting menu or remote release mode. For remote shooting, use the optional ML-L3 remote or Nikon’s wireless mobile utility, enabling hands-free photography ideal for group photos, self-portraits, or minimizing vibrations during tripod-based shots.

Customizing Your Camera

The Nikon D5000 allows customization through its menu system, enabling users to save personal settings as user profiles. Firmware updates ensure optimal performance and maintenance, keeping your camera up-to-date with the latest features and improvements for enhanced functionality and image quality.

8.1 Custom Settings and User Profiles

The Nikon D5000 allows users to save personalized settings as custom profiles, streamlining workflow. Access the menu system to configure options like autofocus modes, metering patterns, and ISO sensitivity. These profiles can be stored and recalled for specific shooting scenarios, enhancing efficiency and ensuring consistent results. This feature is ideal for photographers who frequently switch between different photography styles or environments, offering tailored settings to match their creative needs and preferences. The ability to customize and save profiles makes the D5000 adaptable to various photographic demands, ensuring optimal performance in diverse conditions. By saving these configurations, users can quickly adjust to new situations without recalibrating each setting, making the camera more intuitive and user-friendly. This level of customization empowers photographers to focus on capturing moments rather than adjusting settings repeatedly, thereby improving overall productivity and creative output.

8.2 Firmware Updates and Maintenance

Regular firmware updates for the Nikon D5000 ensure optimal performance and add new features. Download the latest firmware from Nikon’s official website using a memory card and a card reader; Insert the card into the camera, navigate to the firmware update option in the menu, and follow on-screen instructions to complete the installation. After updating, restart the camera to apply changes. Always use genuine Nikon software to avoid compatibility issues and maintain camera functionality. Keeping the firmware updated is crucial for resolving bugs, improving autofocus accuracy, and enhancing overall camera performance. This simple process ensures your D5000 remains up-to-date with the latest advancements, providing a smoother and more efficient photography experience. Regular maintenance, such as cleaning the sensor and updating firmware, helps preserve the camera’s longevity and image quality, ensuring it continues to meet your creative demands effectively.

Troubleshooting Common Issues

Resolve common Nikon D5000 issues like blurry photos, error messages, or memory card locks by checking focus settings, cleaning the sensor, or updating firmware for optimal performance.

9.1 Resolving Error Messages and Camera Malfunctions

Address error messages and malfunctions on your Nikon D5000 by restarting the camera, cleaning the sensor, or updating firmware; For memory card issues, ensure the lock tab is off. If the camera detects a Non-CPU lens, enable the setting in the menu. Consult the manual or Nikon support for specific error codes to restore functionality quickly and effectively.

9.2 Tips for Improving Image Quality and Performance

Enhance your Nikon D5000’s image quality by regularly cleaning the sensor to prevent dust spots. Update firmware for improved functionality and bug fixes. Use high-quality lenses compatible with the D5000 for optimal results. Adjust white balance and autofocus settings to suit your shooting conditions. Consider using fast memory cards and shooting in RAW for better post-processing flexibility. Experiment with burst mode for action shots and explore hidden menu features like the self-timer to reduce camera shake and improve your photography experience.

fundamentals of heat and mass transfer 8th edition pdf

The 8th edition of Fundamentals of Heat and Mass Transfer is a seminal textbook that provides a comprehensive exploration of heat and mass transfer principles. Authored by renowned experts Theodore L. Bergman, Adrienne S. Lavine, Frank P. Incropera, and David P. DeWitt, the book is widely regarded as a gold standard in the field. It offers a structured approach to understanding core concepts, combined with modern applications and visual aids, making it an indispensable resource for both students and professionals;

Overview of the Book

Fundamentals of Heat and Mass Transfer, 8th Edition is a comprehensive textbook that masterfully integrates the principles of heat and mass transfer, serving as a cornerstone for engineering education. Renowned for its clarity and depth, the book balances theoretical foundations with practical applications, making it indispensable for students and professionals alike. It covers a wide range of topics, from basic concepts to advanced problem-solving techniques, supported by detailed examples and modern visual aids. The 8th edition reflects the latest advancements in the field, ensuring readers gain a robust understanding of heat and mass transfer phenomena.

Authors and Their Contributions

The 8th edition of Fundamentals of Heat and Mass Transfer is authored by Theodore L. Bergman, Adrienne S. Lavine, Frank P. Incropera, and David P. DeWitt, all distinguished experts in thermal sciences. Bergman and Lavine are known for their contributions to conduction and radiation, while Incropera and DeWitt have significantly advanced heat transfer education. Their collective expertise ensures the book’s content is both authoritative and accessible, providing a balanced approach to teaching and learning. Their work has set a benchmark for textbooks in the field of heat and mass transfer.

Key Features of the 8th Edition

The 8th edition includes updated chapters, enhanced visual aids, and new problem-solving tools, offering a comprehensive and modern approach to learning heat and mass transfer.

Updates and Improvements from Previous Editions

The 8th edition of Fundamentals of Heat and Mass Transfer introduces significant updates, including revised chapters, enhanced visual aids, and new problem-solving tools. Key improvements include expanded coverage of emerging topics, such as microscale heat transfer and biological applications, while maintaining the core principles that have made the book a classic. The addition of interactive learning resources and updated references ensures a more comprehensive and accessible learning experience for students and professionals alike. These enhancements reflect the evolving nature of the field and the authors’ commitment to excellence in education.

New Topics and Enhanced Coverage

The 8th edition of Fundamentals of Heat and Mass Transfer incorporates cutting-edge topics such as microscale heat transfer, biological systems, and advanced computational methods. Enhanced coverage of emerging areas like nanotechnology and sustainable energy applications provides students with a broader understanding of modern engineering challenges. Additionally, the book features expanded problem sets, updated case studies, and improved visual aids to facilitate deeper comprehension. These additions ensure the text remains relevant and aligned with current research and industry trends, offering a more comprehensive learning experience for students and professionals in the field.

Structure and Organization of the Book

The book is organized logically, with chapters progressing from fundamental principles to advanced applications, ensuring clarity and ease of understanding for both students and professionals.

Chapters and Their Focus Areas

The 8th edition is divided into comprehensive chapters, each focusing on specific aspects of heat and mass transfer. Early chapters establish foundational concepts, such as conduction, convection, and radiation, while later sections delve into mass transfer principles and their interplay with heat transfer. The book also includes dedicated chapters on real-world applications, ensuring a balanced blend of theory and practice. Each chapter is supported by detailed illustrations, tables, and example problems, making complex topics accessible to students and professionals alike. This structured approach ensures a thorough understanding of the subject matter.

Learning Aids and Resources for Students

The 8th edition provides extensive learning aids to enhance student understanding. These include end-of-chapter problems, visual illustrations, and summary tables to reinforce key concepts. Supplementary materials, such as interactive tools and online resources, are available to deepen engagement. The textbook also offers worked-out examples and case studies, allowing students to apply theoretical knowledge to practical scenarios. Additionally, the book includes appendices with property tables and charts, serving as quick references for problem-solving. These resources collectively ensure a comprehensive and interactive learning experience, catering to diverse learning styles and needs.

Theoretical Foundations

The text establishes core theoretical concepts in heat and mass transfer, including conduction, convection, and radiation mechanisms. It provides a solid foundation for understanding transfer processes.

Core Concepts in Heat Transfer

The 8th edition delves into fundamental heat transfer mechanisms, including conduction, convection, and radiation. It explores the Fourier Law, thermal conductivity, and heat flux in detail. Convection is examined through boundary layer theory and distinctions between forced and natural convection. Radiation principles, such as blackbody radiation and emissivity, are thoroughly discussed. The text provides clear explanations and visual aids, such as diagrams and examples, to illustrate these concepts. These foundational topics are essential for understanding heat transfer processes and form the basis for advanced theoretical and practical applications in engineering and related fields.

Mass Transfer Principles and Mechanisms

The 8th edition thoroughly explores mass transfer principles, emphasizing diffusion, concentration gradients, and flux. Fick’s Law of Diffusion is central, explaining mass transport in various media. The text also covers convective mass transfer, highlighting boundary layer theory and mass transfer coefficients. Practical examples illustrate mechanisms like molecular diffusion and eddy diffusion, while also addressing mass transfer in multiphase systems. These principles are supported by detailed derivations and real-world applications, making the content accessible and relevant for students and professionals in engineering and related disciplines.

Practical Applications and Case Studies

The 8th edition provides extensive real-world examples, showcasing heat and mass transfer in engineering, including cooling systems, chemical processing, and thermal management in electronics.

Real-World Examples in Heat and Mass Transfer

The 8th edition illustrates practical applications through detailed case studies, such as cooling systems in electronics, heat exchangers in power plants, and mass transfer in chemical reactors. These examples demonstrate how theoretical concepts are applied to solve real-world engineering challenges. The textbook also explores thermal management in aerospace and biomedical engineering, providing students with a comprehensive understanding of heat and mass transfer in diverse industries. By linking theory to practice, the book prepares learners to tackle complex problems in modern engineering scenarios effectively.

Industrial Applications and Problem Solving

The 8th edition emphasizes practical problem-solving in industrial settings, with detailed examples like cooling systems in electronics and heat exchangers in power plants. These real-world applications highlight how heat and mass transfer principles resolve engineering challenges. The book also provides end-of-chapter problems and design projects, enabling students to apply theoretical knowledge. By focusing on industrial relevance, the textbook bridges academic concepts with professional practice, equipping learners to address complex issues in fields like aerospace and chemical engineering effectively.

Teaching and Learning Resources

The 8th edition provides extensive resources, including instructor supplements, student resources, and online companions. These tools enhance learning and teaching experiences, offering problem solutions and visual aids.

Instructor Supplements and Support Materials

The 8th edition offers comprehensive instructor supplements, including detailed solutions to end-of-chapter problems and lecture slides. These resources are designed to streamline course preparation and delivery. Additionally, the companion website provides access to electronic materials, such as test banks and customizable PowerPoint presentations, enabling instructors to tailor their teaching methods effectively. These support materials ensure a consistent and high-quality learning experience, aligning with the textbook’s content seamlessly. They are invaluable for educators aiming to maximize student engagement and understanding in the classroom.

Student Resources for Better Understanding

The 8th edition provides extensive student resources to enhance learning, including a companion website with interactive tools and downloadable materials. Students can access solutions to end-of-chapter problems, offering clarity on complex concepts. Additional resources include online tutorials, practice problems, and visual aids like diagrams and charts. These materials are designed to supplement classroom instruction, allowing students to review and reinforce their understanding at their own pace. The textbook also offers access to digital versions, enabling flexible study options. These resources collectively empower students to grasp the fundamentals of heat and mass transfer effectively.

Fundamentals of Heat and Mass Transfer, 8th Edition remains a cornerstone in engineering education, shaping future research and applications in sustainability, renewable energy, and advanced materials.

Impact of the Book on the Field

Fundamentals of Heat and Mass Transfer, 8th Edition has profoundly influenced engineering education and practice, serving as a cornerstone for understanding thermal and mass transport phenomena. Its comprehensive coverage and clear explanations have educated generations of engineers, shaping advancements in energy systems, aerospace, and industrial processes. Recognized as a gold standard, the text bridges theory and application, fostering innovation in heat transfer technologies and sustainability. Its widespread adoption underscores its enduring relevance in academia and industry.

Emerging Trends in Heat and Mass Transfer

Recent advancements in heat and mass transfer research emphasize microscale and nanoscale phenomena, computational modeling, and sustainable energy applications. The 8th edition highlights these trends, exploring topics like nanotechnology and bioheat transfer. Increased focus on computational fluid dynamics and experimental techniques reflects modern problem-solving approaches. Additionally, the integration of machine learning for predictive modeling in thermal systems is gaining traction. These developments underscore the evolving nature of the field, aligning with global demands for energy efficiency and environmental sustainability, as detailed in the textbook’s updated chapters and case studies.

strata by-laws wa pdf

Strata by-laws in Western Australia regulate shared living spaces‚ governed by the Strata Titles Act 1985 and default by-laws effective from 1 May 2020. The WA Strata Living Guide provides essential insights.

1.1 Definition and Purpose of Strata By-Laws

Strata by-laws are rules that govern the use and management of shared spaces in strata schemes‚ ensuring harmonious living. They outline responsibilities of owners and occupiers‚ addressing noise‚ parking‚ and modifications. By-laws are created under the Strata Titles Act 1985 and are legally binding. Their purpose is to maintain property values‚ safety‚ and community standards‚ providing a framework for resolving disputes and managing common areas effectively. Default by-laws are available for schemes without custom rules‚ ensuring consistency across Western Australia.

1.2 Importance of Understanding Strata By-Laws in WA

Understanding strata by-laws is crucial for maintaining order and harmony within strata schemes. They outline rules for shared spaces‚ noise restrictions‚ and property modifications. Awareness ensures compliance‚ avoiding penalties‚ and facilitates dispute resolution. By-laws also clarify responsibilities‚ protecting property values and community standards. Default by-laws apply to schemes without custom rules‚ while the Strata Titles Act 1985 governs their creation and enforcement. Staying informed helps owners and occupiers navigate their obligations effectively in Western Australia.

Legislative Framework Governing Strata By-Laws in WA

The legislative framework for strata by-laws in WA is primarily governed by the Strata Titles Act 1985 and the Strata Titles (General) Regulations 2019‚ ensuring compliance and enforcement.

2.1 Strata Titles Act 1985 and Its Relevance

The Strata Titles Act 1985 is the primary legislation governing strata by-laws in Western Australia. It establishes the framework for creating‚ managing‚ and enforcing by-laws within strata schemes. The Act outlines the rights and responsibilities of lot owners‚ occupiers‚ and strata companies‚ ensuring orderly shared living environments; Key amendments in 2018 enhanced governance and dispute resolution processes. The Act remains central to understanding and complying with strata by-laws‚ providing clarity on enforcement mechanisms and penalties for non-compliance. It is accessible via the WA legislation website.

2.2 Key Amendments to the Strata Titles Act 1985

Significant amendments to the Strata Titles Act 1985 in 2018 and 2020 modernized strata governance in WA. These changes introduced default by-laws effective from 1 May 2020‚ providing clarity on governance‚ exclusive use‚ and leasehold arrangements. Amendments also enhanced dispute resolution processes and strengthened penalties for non-compliance. Additionally‚ provisions for staged subdivisions and survey-strata schemes were updated‚ aligning the legislation with contemporary strata living needs. These reforms aim to improve transparency‚ fairness‚ and efficiency in strata management across Western Australia.

2.3 Strata Titles (General) Regulations 2019 (STGR 2019)

The Strata Titles (General) Regulations 2019 (STGR 2019) support the Strata Titles Act 1985‚ providing operational rules for strata schemes in WA. Effective from 1 May 2020‚ these regulations include model by-laws‚ dispute resolution processes‚ and disclosure requirements. They also outline procedures for scheme termination and lot owner obligations. The STGR 2019 ensures consistency and clarity in strata governance‚ aligning with the broader reforms introduced in 2020 to enhance transparency and efficiency in strata management across Western Australia.

Types of Strata By-Laws in WA

Strata by-laws in WA include governance‚ exclusive use‚ leasehold‚ and staged subdivision by-laws‚ each addressing specific aspects of shared property management and owner responsibilities.

3.1 Governance By-Laws

Governance by-laws in Western Australia outline the rules for managing strata schemes‚ including duties of owners‚ use of common property‚ and procedures for meetings. They ensure smooth operation and compliance with the Strata Titles Act 1985‚ providing a framework for decision-making and dispute resolution. These by-laws are essential for maintaining order and harmony within strata communities‚ addressing key aspects of shared living and property management.

3.2 Exclusive Use By-Laws

Exclusive use by-laws in Western Australia grant specific lots or owners exclusive rights to use common property areas‚ such as parking spots or courtyards. These by-laws are registered with Landgate and must be approved by the strata company. They provide clarity on shared spaces‚ preventing disputes and ensuring fair usage. Proper documentation and legal compliance are crucial when creating or amending exclusive use by-laws to maintain harmony within the strata community.

3.3 Leasehold By-Laws

Leasehold by-laws in Western Australia govern schemes where land is leased‚ often for residential or commercial purposes. These by-laws outline lease terms‚ renewal processes‚ and obligations of lot owners. They ensure compliance with lease agreements and protect the interests of all parties involved. Leasehold by-laws are essential for maintaining clarity and order in leased strata developments‚ addressing specific needs unique to leasehold properties. Proper enforcement ensures smooth operations and harmonious living within the community.

3.4 Staged Subdivision By-Laws

Staged subdivision by-laws in Western Australia are designed for developments that occur in phases. These by-laws address the unique challenges of multi-stage projects‚ ensuring clarity on ownership‚ liability‚ and future development. They outline the rights and responsibilities of lot owners during each stage‚ providing a framework for ongoing management. Properly structured staged subdivision by-laws are essential for maintaining order and preventing disputes in evolving strata developments. They ensure that all parties are aware of their obligations throughout the development process.

Default Strata By-Laws in WA

Default by-laws in WA‚ effective from 1 May 2020‚ provide a standard framework for strata schemes that have not registered their own by-laws with Landgate.

4.1 Default By-Laws Effective from 1 May 2020

The default by-laws introduced on 1 May 2020 provide a standardized framework for strata schemes in Western Australia. These by-laws cover essential aspects such as owner responsibilities‚ use of common property‚ and governance processes. They ensure consistency across schemes that have not adopted specific by-laws. Compliance with these default regulations is mandatory‚ and they are designed to promote harmony and clarity within strata communities. The reforms aim to modernize strata living and address emerging property management needs effectively.

4.2 Summary of Default By-Laws Provisions

The default by-laws outline key provisions for strata schemes‚ including owner duties‚ common property use‚ and governance; They prohibit visible signage‚ restrict storage of inflammable liquids‚ and mandate compliance with written laws. Owners must maintain their lots and avoid causing disturbances. These provisions aim to ensure orderly living‚ protect property values‚ and clarify responsibilities under the Strata Titles Act 1985 and Strata Titles (General) Regulations 2019.

4.3 Transition Process for Existing Schemes

Existing strata schemes registered before 1 May 2020 can adopt the default by-laws or retain their current by-laws. Schemes must lodge amended by-laws with Landgate if they choose to modify or adopt new provisions. The transition process ensures continuity‚ allowing schemes to align with updated regulations voluntarily. This flexibility helps strata companies adapt to the reforms without immediate disruption‚ while maintaining compliance with the Strata Titles Act 1985 and related amendments.

Enforcement and Penalties for Non-Compliance

Strata by-laws in WA are enforced through the State Administrative Tribunal (SAT)‚ with penalties for non-compliance‚ ensuring adherence to community standards and legal requirements.

5.1 Mechanisms for Enforcing Strata By-Laws

Strata by-laws in WA are enforced through the State Administrative Tribunal (SAT)‚ which resolves disputes and ensures compliance. Enforcement mechanisms include mediation‚ penalties‚ and fines for breaches. SAT provides a structured process to address non-compliance‚ ensuring community standards are upheld. Owners or occupiers found breaching by-laws may face financial penalties‚ while the strata company can seek orders to remedy violations. These mechanisms ensure the fair and consistent application of by-laws within strata schemes.

5.2 Penalties for Breaching Strata By-Laws

Breaching strata by-laws in WA can result in penalties‚ including fines imposed by the State Administrative Tribunal (SAT). These penalties aim to ensure compliance with community standards. Fines are proportional to the severity of the breach‚ with maximum amounts specified under the Strata Titles Act 1985. Repeated or deliberate violations may lead to higher penalties. Enforcement measures are designed to maintain order and protect the interests of all lot owners within the strata scheme.

Creating and Amending Strata By-Laws

Creating or amending strata by-laws involves a structured process‚ requiring approval from the strata company and lodgement with Landgate to ensure compliance with WA legislation.

6.1 Process for Creating or Amending By-Laws

The process involves the strata company proposing changes‚ which must be approved by a special resolution at a general meeting. Amended by-laws are then prepared‚ ensuring compliance with WA legislation. Once approved‚ the updated by-laws are lodged with Landgate‚ becoming enforceable from the lodgement date. If the strata company fails to lodge within the required timeframe or meet criteria‚ default by-laws may apply‚ ensuring continuity of governance.

6.2 Role of the Strata Company and Committee

The strata company and its committee play a pivotal role in managing by-laws‚ ensuring they align with the Strata Titles Act 1985 and STGR 2019. The committee oversees the enforcement of by-laws‚ addresses breaches‚ and facilitates amendments. They are responsible for convening meetings to discuss proposed changes and ensuring all owners are informed. The strata company also maintains records of by-laws and lodges amendments with Landgate‚ ensuring compliance and transparency in governance.

6.3 Lodgement of By-Laws with Landgate

Lodgement of by-laws with Landgate is a critical step for their legal enforceability. The strata company must submit the approved by-laws to Landgate‚ ensuring compliance with the Strata Titles Act 1985 and STGR 2019. This process involves completing the required forms and paying the applicable fees. Lodgement ensures the by-laws are recorded and accessible‚ providing clarity for lot owners and stakeholders. It is essential for maintaining transparency and proper governance within the strata scheme.

Accessing Strata By-Laws in WA

Strata by-laws in WA can be accessed via the WA Strata Living Guide and the Landgate website‚ providing transparency and easy access for lot owners and stakeholders.

7.1 WA Strata Living Guide as a Resource

The WA Strata Living Guide is a comprehensive resource for understanding strata by-laws in Western Australia. It provides detailed information on default by-laws effective from 1 May 2020‚ governance‚ and exclusive use by-laws. The guide also outlines the transition process for existing schemes and offers practical insights for lot owners‚ occupiers‚ and strata companies. Available in print and digital formats‚ it is published by the Department of Commerce and can be accessed online‚ making it an essential reference for anyone involved in strata living.

7.2 Availability of By-Laws on the Landgate Website

Strata by-laws in Western Australia are accessible through the Landgate website‚ providing transparent access to property details. Lot owners and managers can search and download by-laws specific to their scheme. The platform ensures up-to-date information‚ reflecting amendments and lodgements. This resource is essential for understanding governance‚ exclusive use‚ and leasehold by-laws. Accessing by-laws on Landgate supports compliance and informed decision-making within strata communities.

Frequently Asked Questions (FAQs)

Common questions about strata by-laws in WA include queries about enforcement‚ penalties‚ and amendments. Default by-laws and their application are also frequently discussed topics among owners.

8.1 Common Queries About Strata By-Laws in WA

Common questions about strata by-laws in WA often revolve around enforcement‚ penalties‚ and amendment processes. Many owners inquire about exclusive use by-laws and default by-law provisions effective from 1 May 2020. Transitioning schemes registered before this date also seek clarity on adopting new by-laws. Additionally‚ understanding the role of the strata company and penalties for non-compliance are frequent topics of discussion among residents and managers.

Recent Reforms and Their Impact on Strata By-Laws

Recent reforms introduced on 1 May 2020 modernized WA strata by-laws‚ enhancing clarity and enforcement. Key changes include updated default by-laws and streamlined amendment processes.

9.1 Key Changes Introduced in 2020

The 2020 reforms introduced updated default by-laws‚ simplifying processes for creating and amending rules. Enforcement mechanisms were strengthened‚ with penalties for non-compliance. Provisions for exclusive use and staged subdivisions were clarified‚ ensuring better governance and clarity for strata schemes.

Page 1 of 2

Powered by WordPress & Theme by Anders Norén